Customer
1.Overview
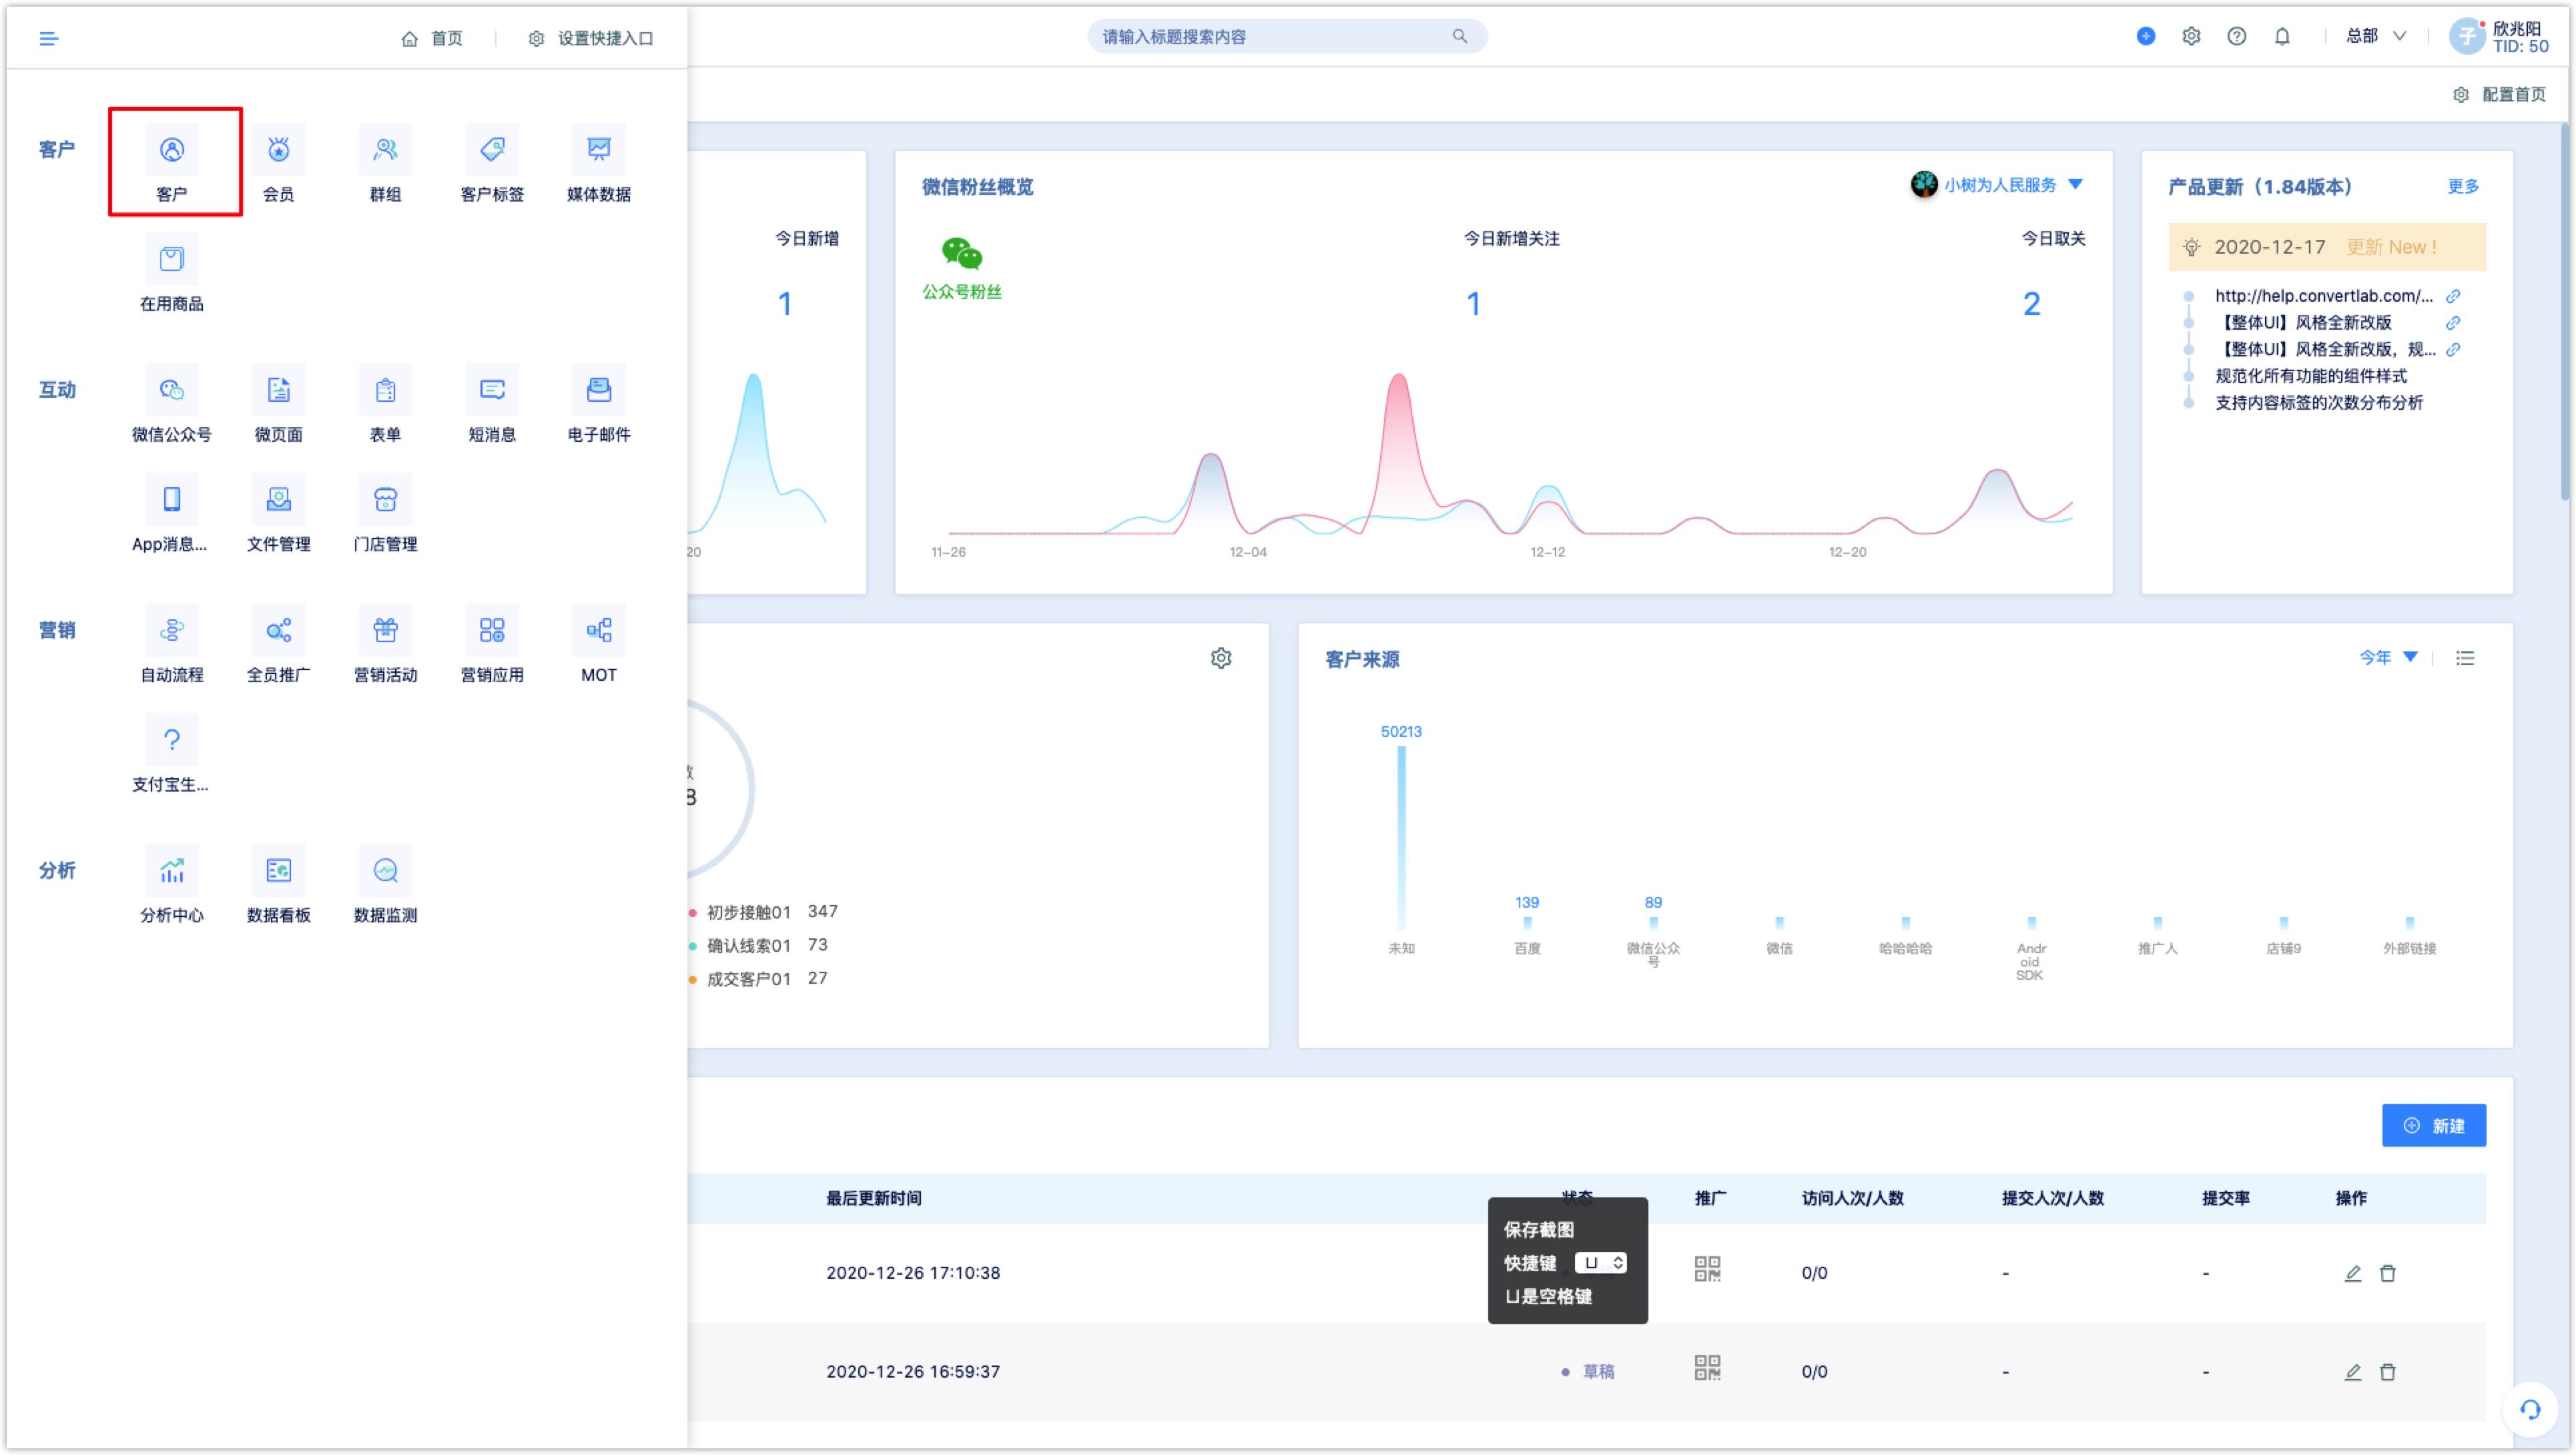
In the client module, one can have CURD (add, search, modify, delete), merge and export operations on customers, click the menu on the left to enter the customer list.
2.Customer List
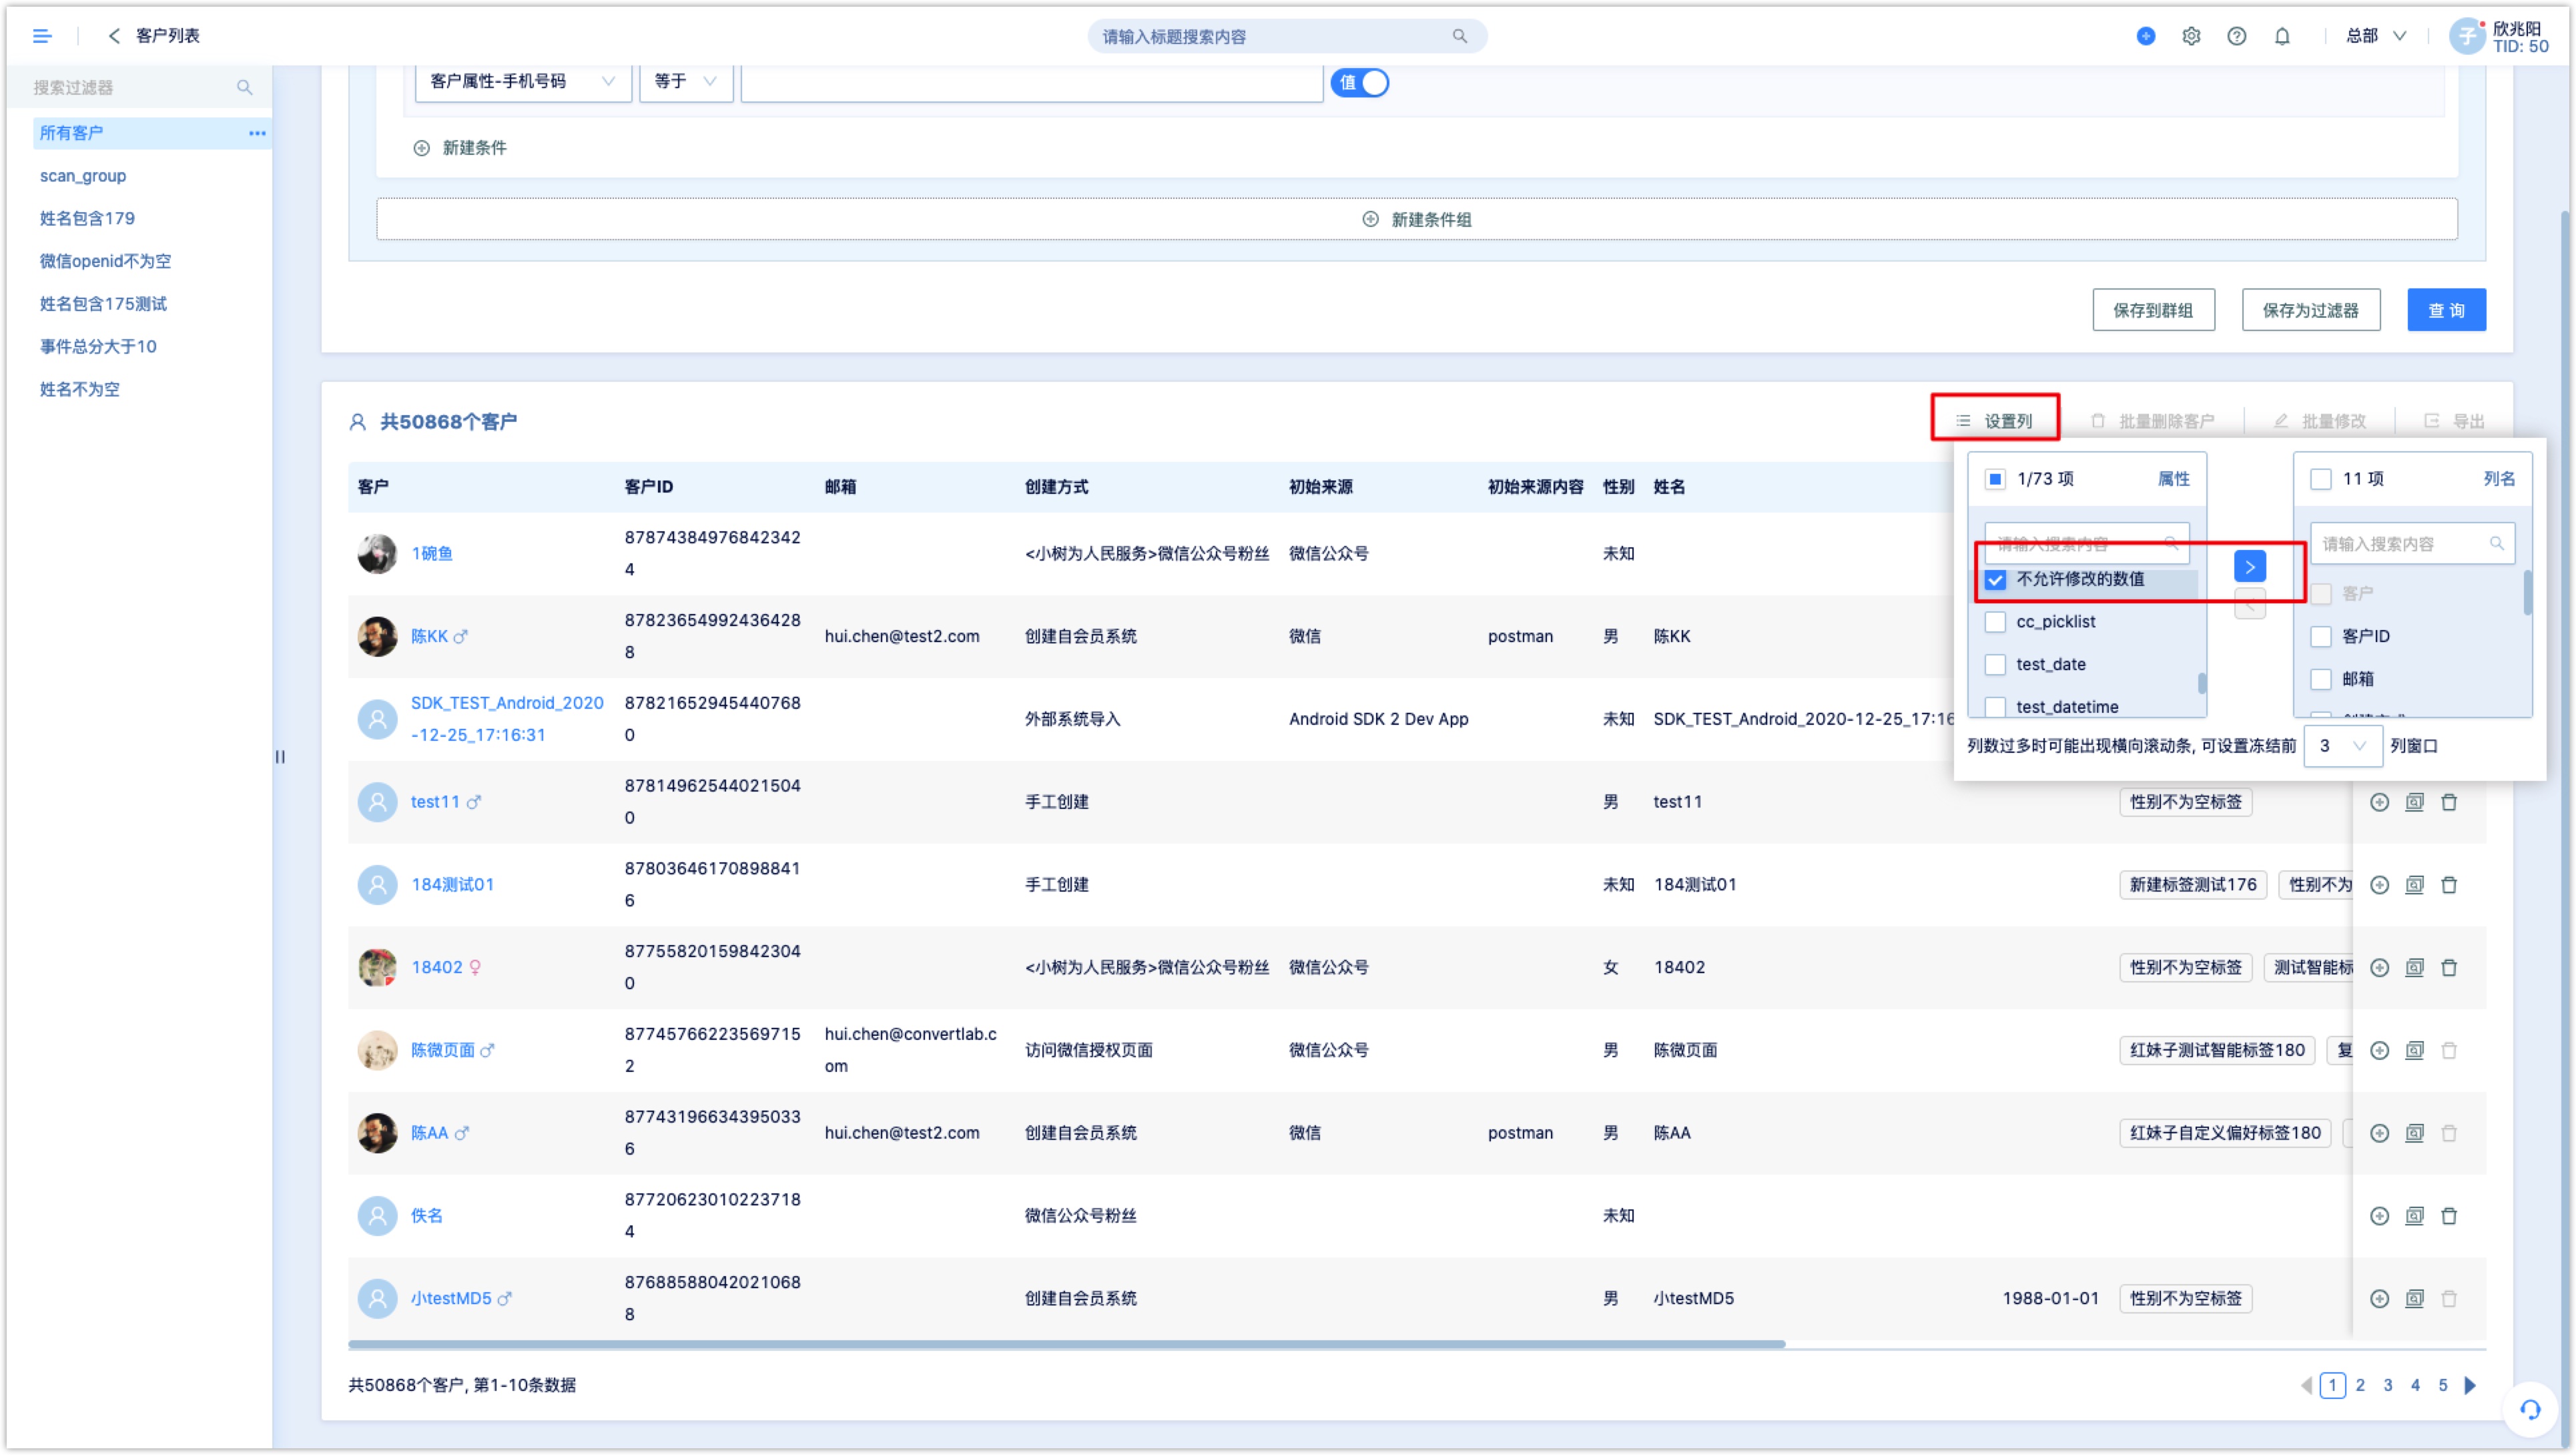
The Customer List displays all customers, and the list page can be customized to display customer-related attribute information. The settings are as follows:
Click [Settings column] at the top right of the list to add the fields you want to display. Tick the customer attributes to be displayed on the left and click [>]. Similarly, if a column does not need to be displayed, tick it and click [<] to cancel the display. In the column name on the right, column name can also be dragged to adjust the display order.
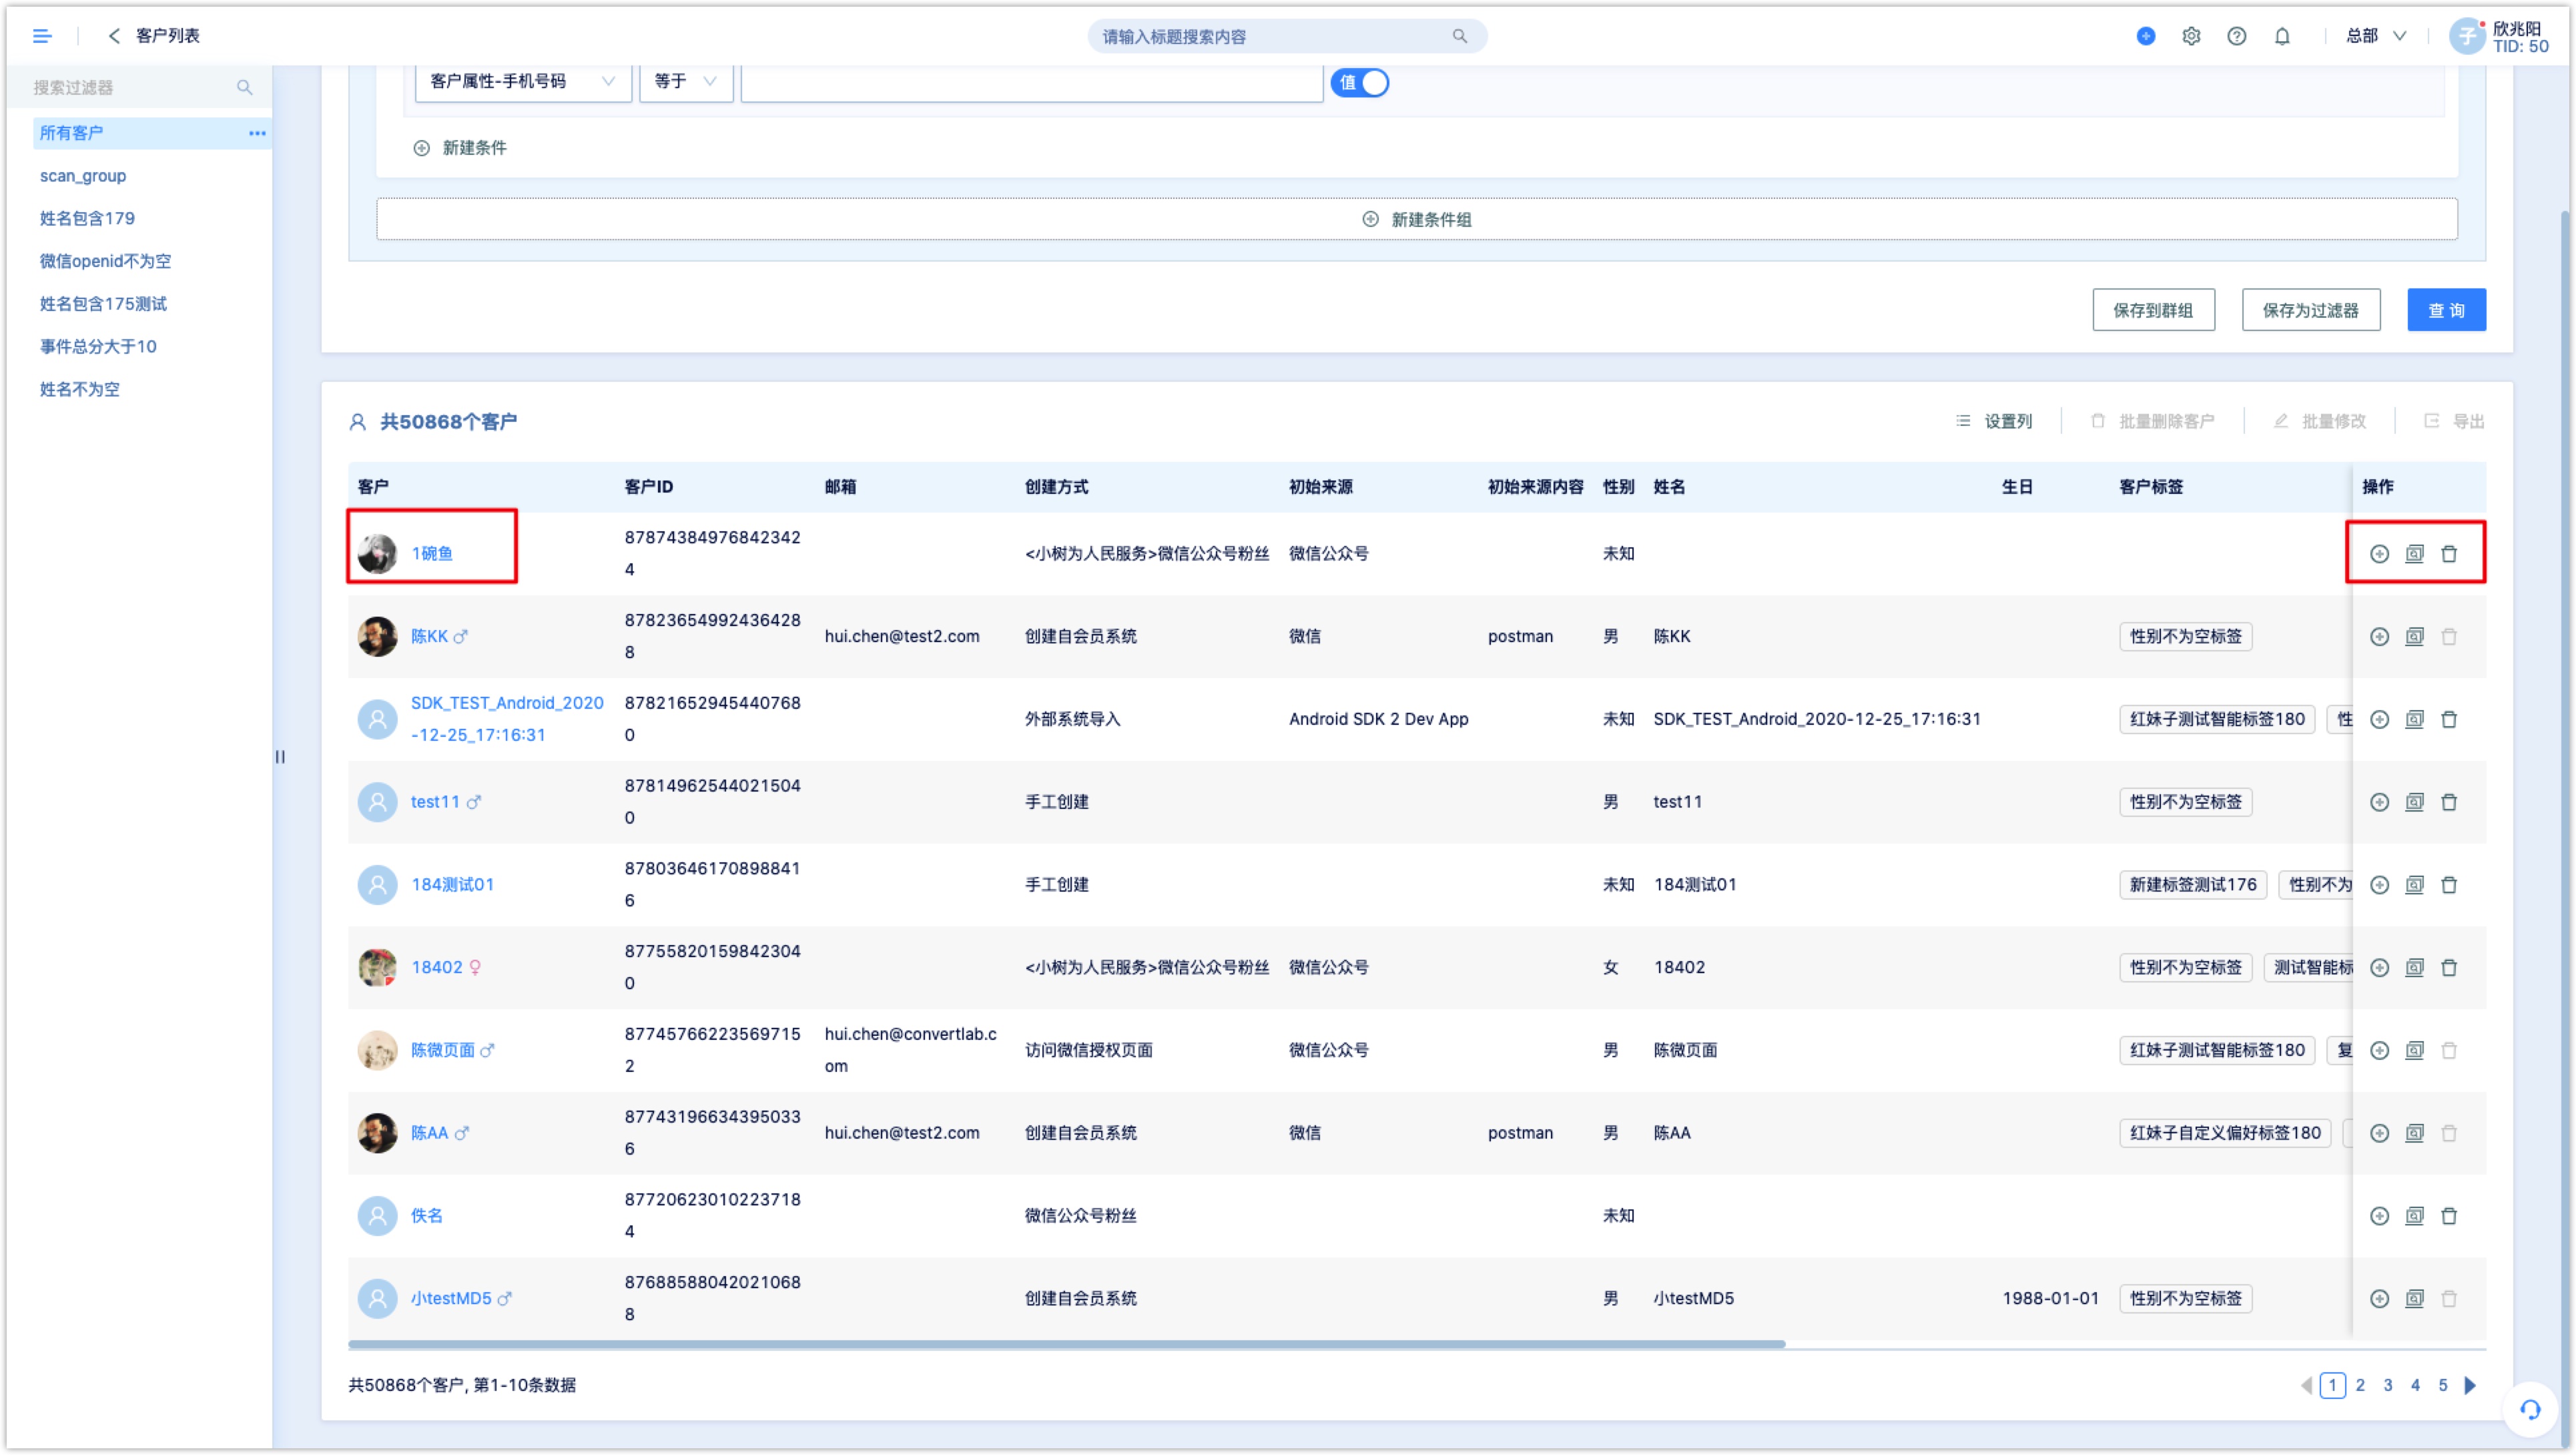
On the right side of the customer list, a new task could be created for the customer and the customer could also be deleted. Click the customer avatar or customer name allows you to enter the customer details page.
2.1Add Customers
There are two ways to add new customers: creating customers and importing customers in bulk. Customers created by phone numbers and email addresses are UNVERIFIED.
2.1.1Create Customer
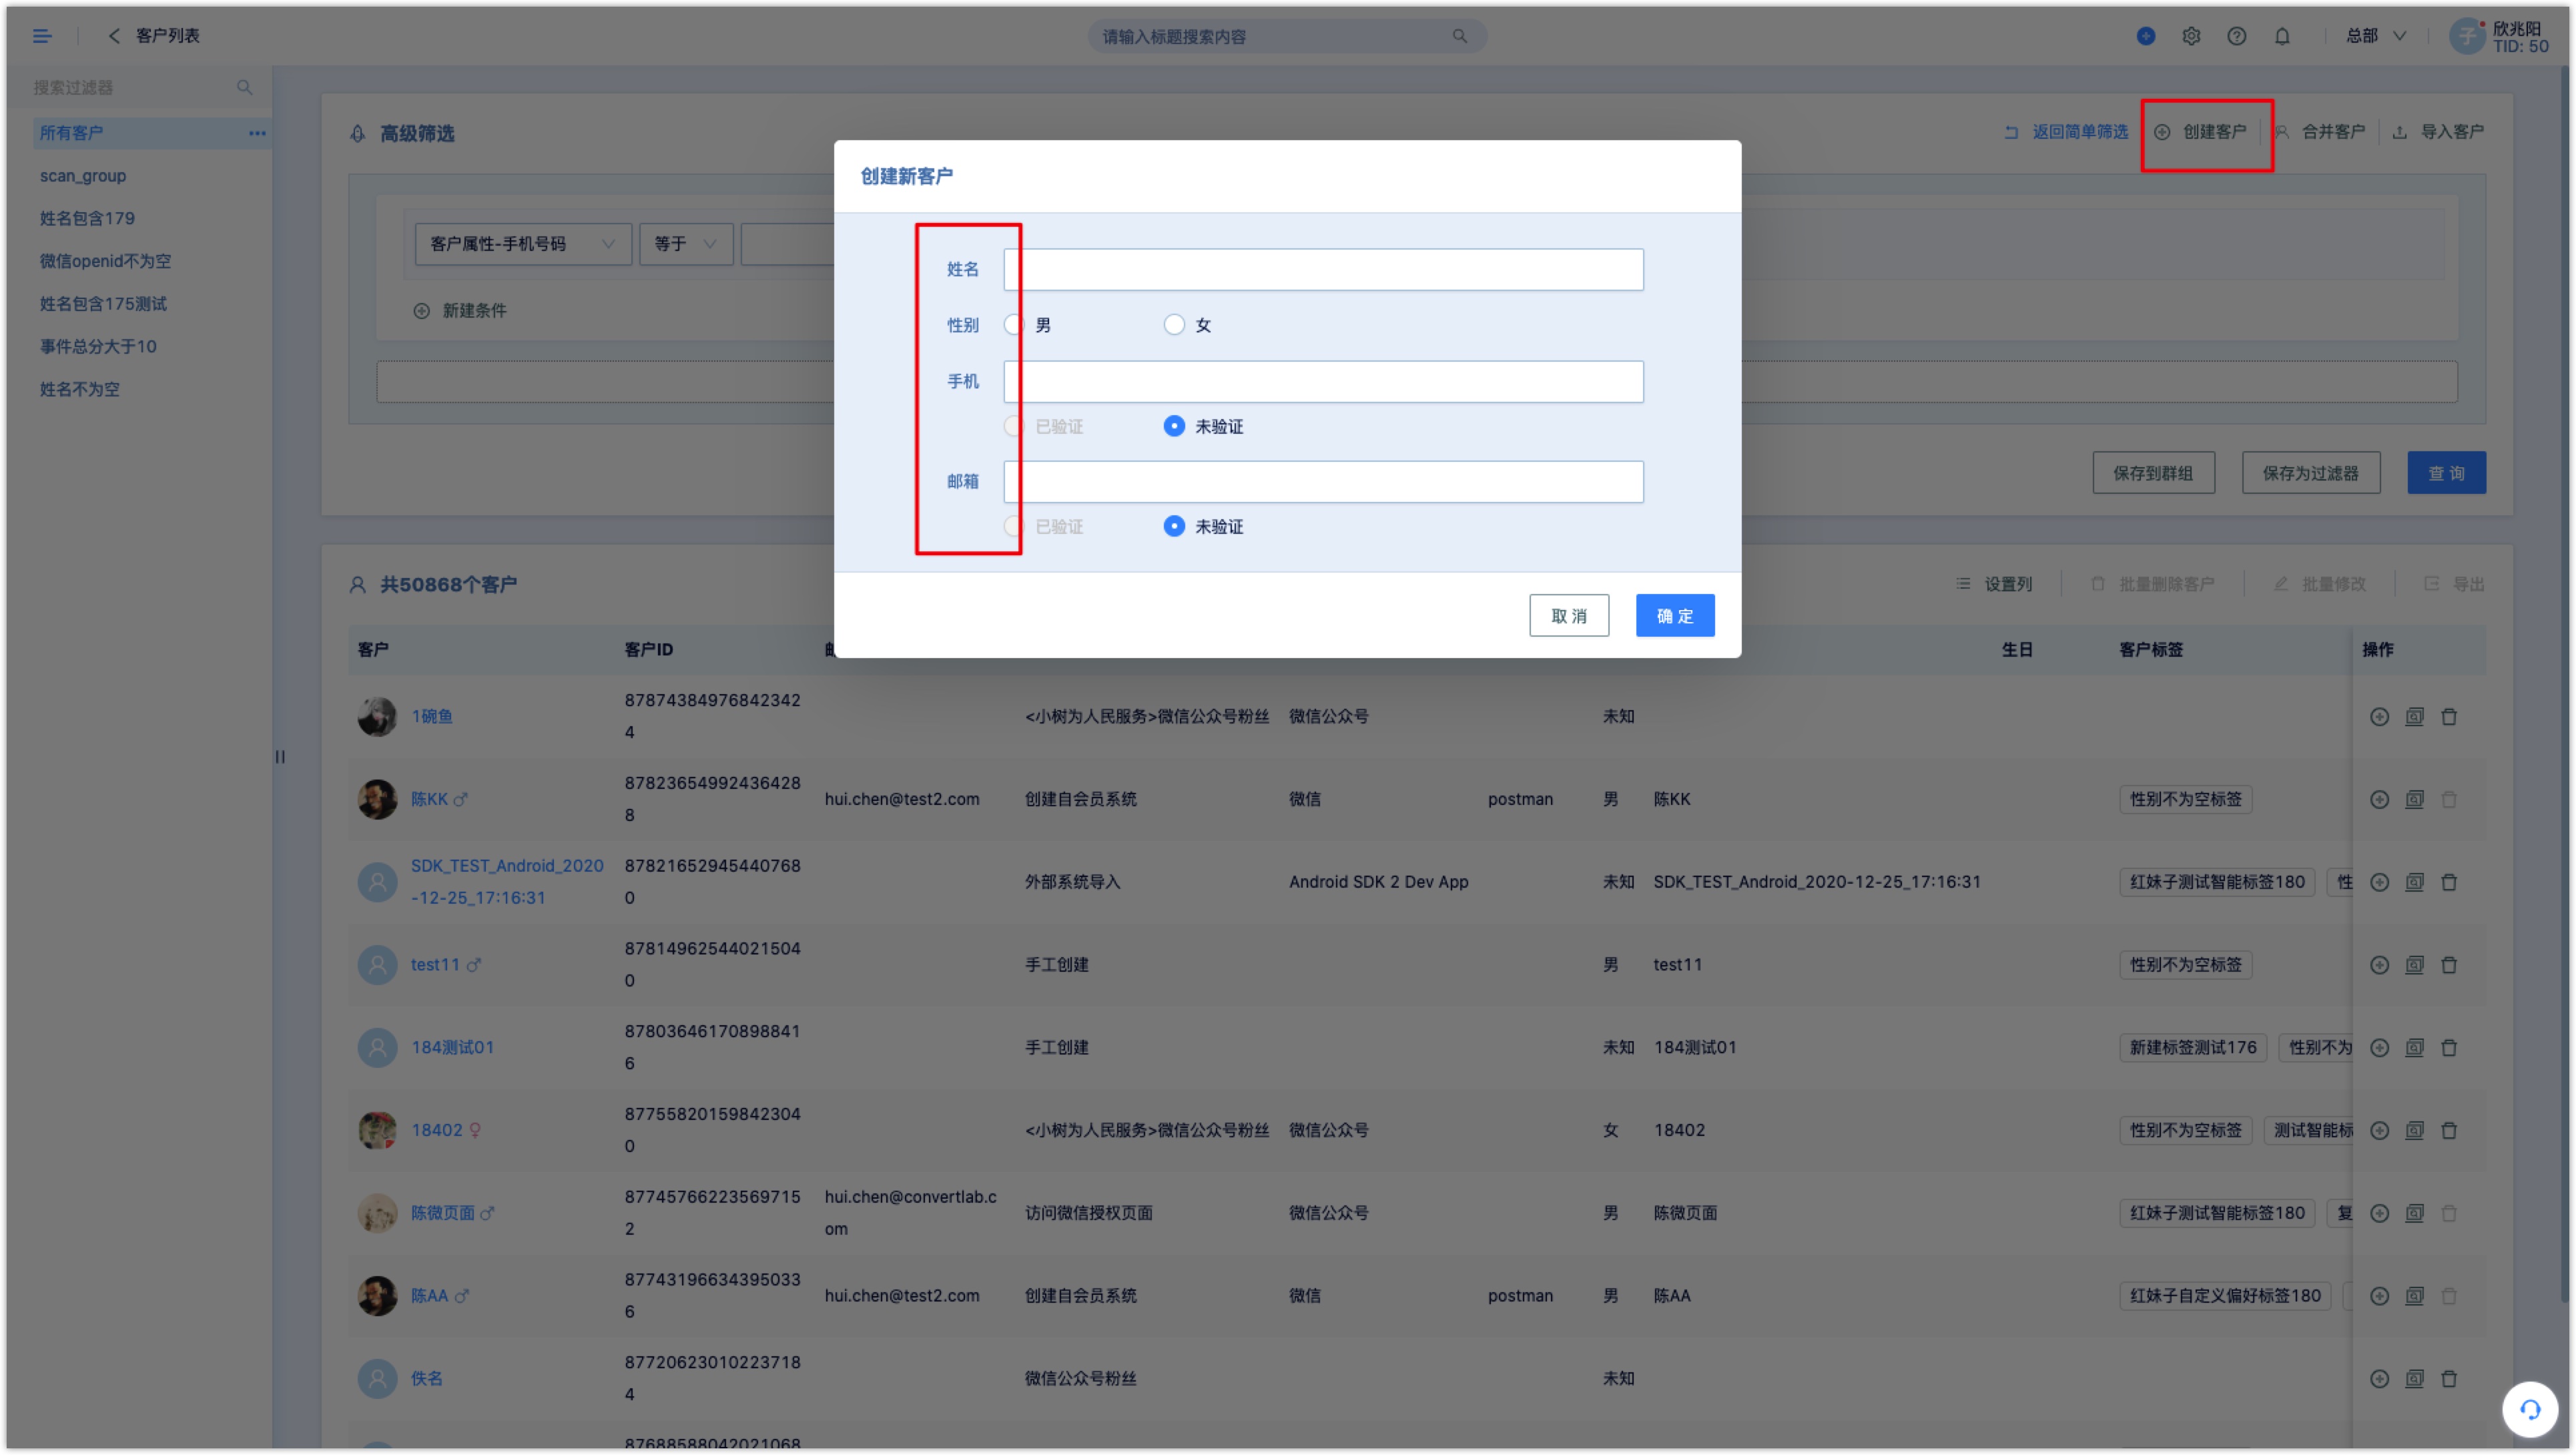
Click [Create Customer]to manually add customer clues, input customer clues and save them, then a new customer could be created.
2.1.2Import customers
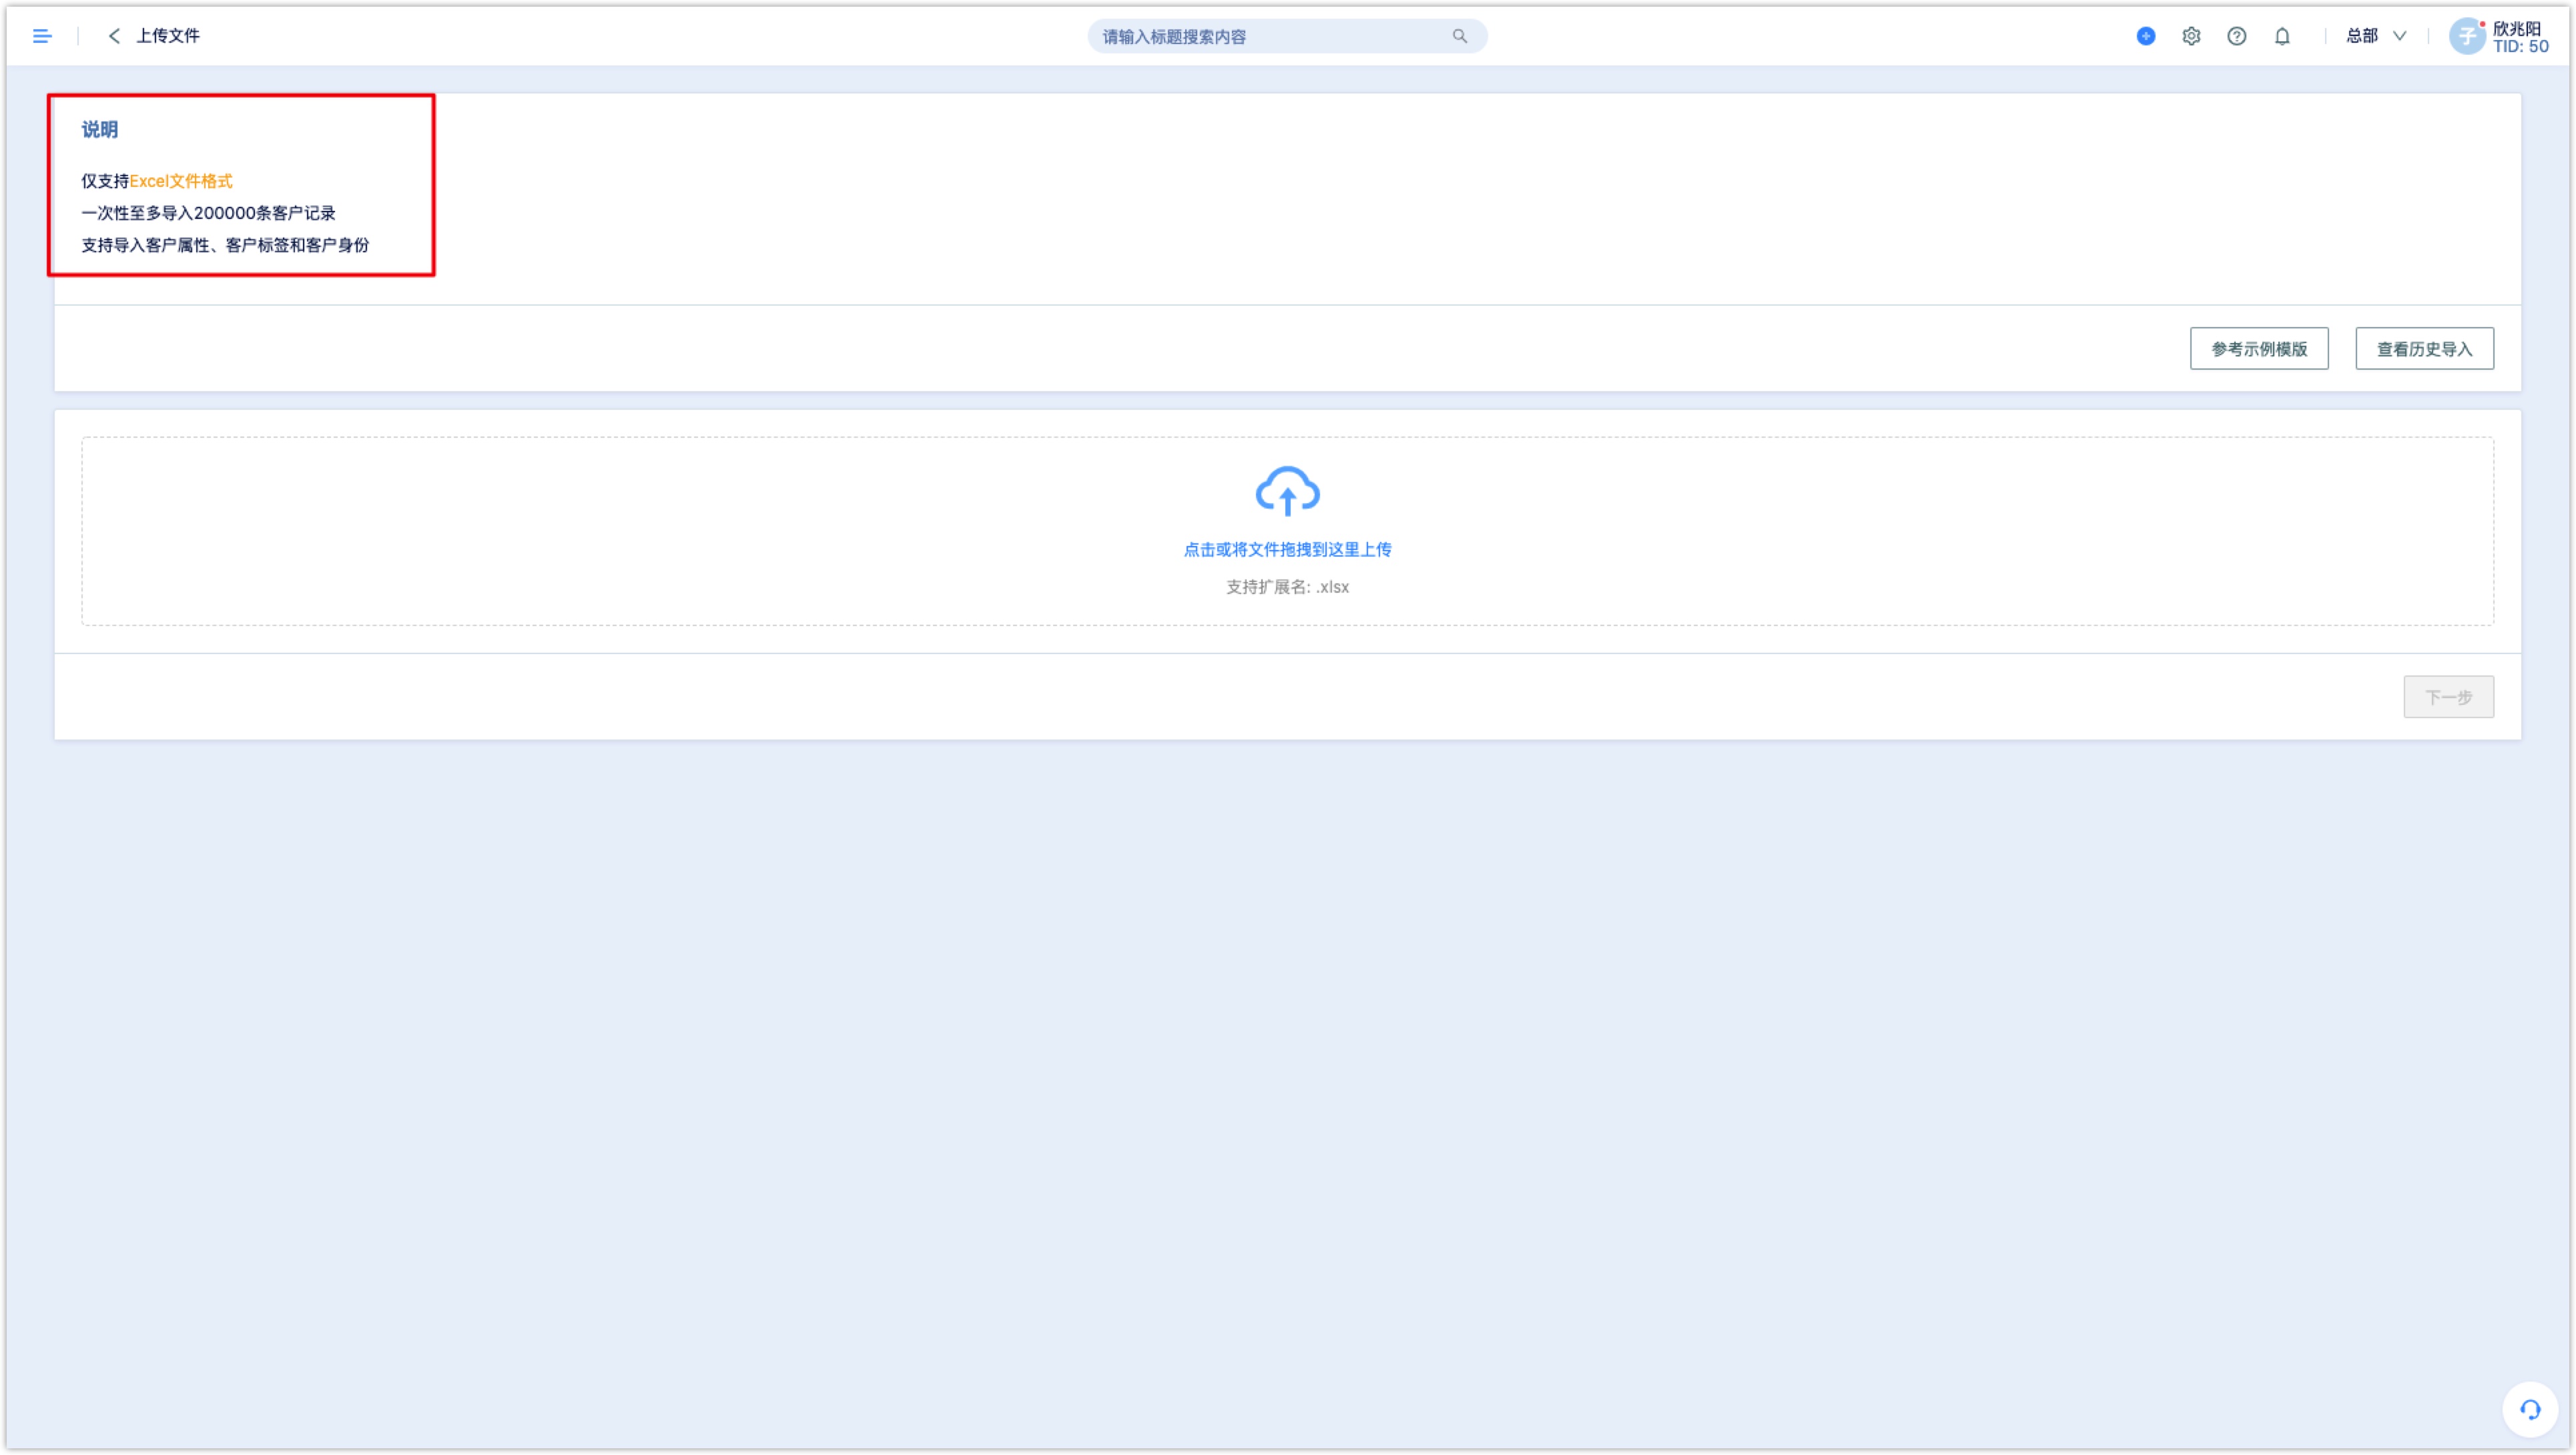
Click [Import customer] to import the files that have been completed containing customer data directly into the system, this is apply to bulk importing. Only the Excel file format is supported, and also, import of customer attributes, customer tags, and customer identities are supported. Up to 200,000 pieces of data is allowed to import at a time.
Match the customer settings after the files are uploaded.
Note: When importing customer identity is not set, customer identification matching would be carried out through the three customer attributes, [customer id], [mobile phone number] or [mailbox].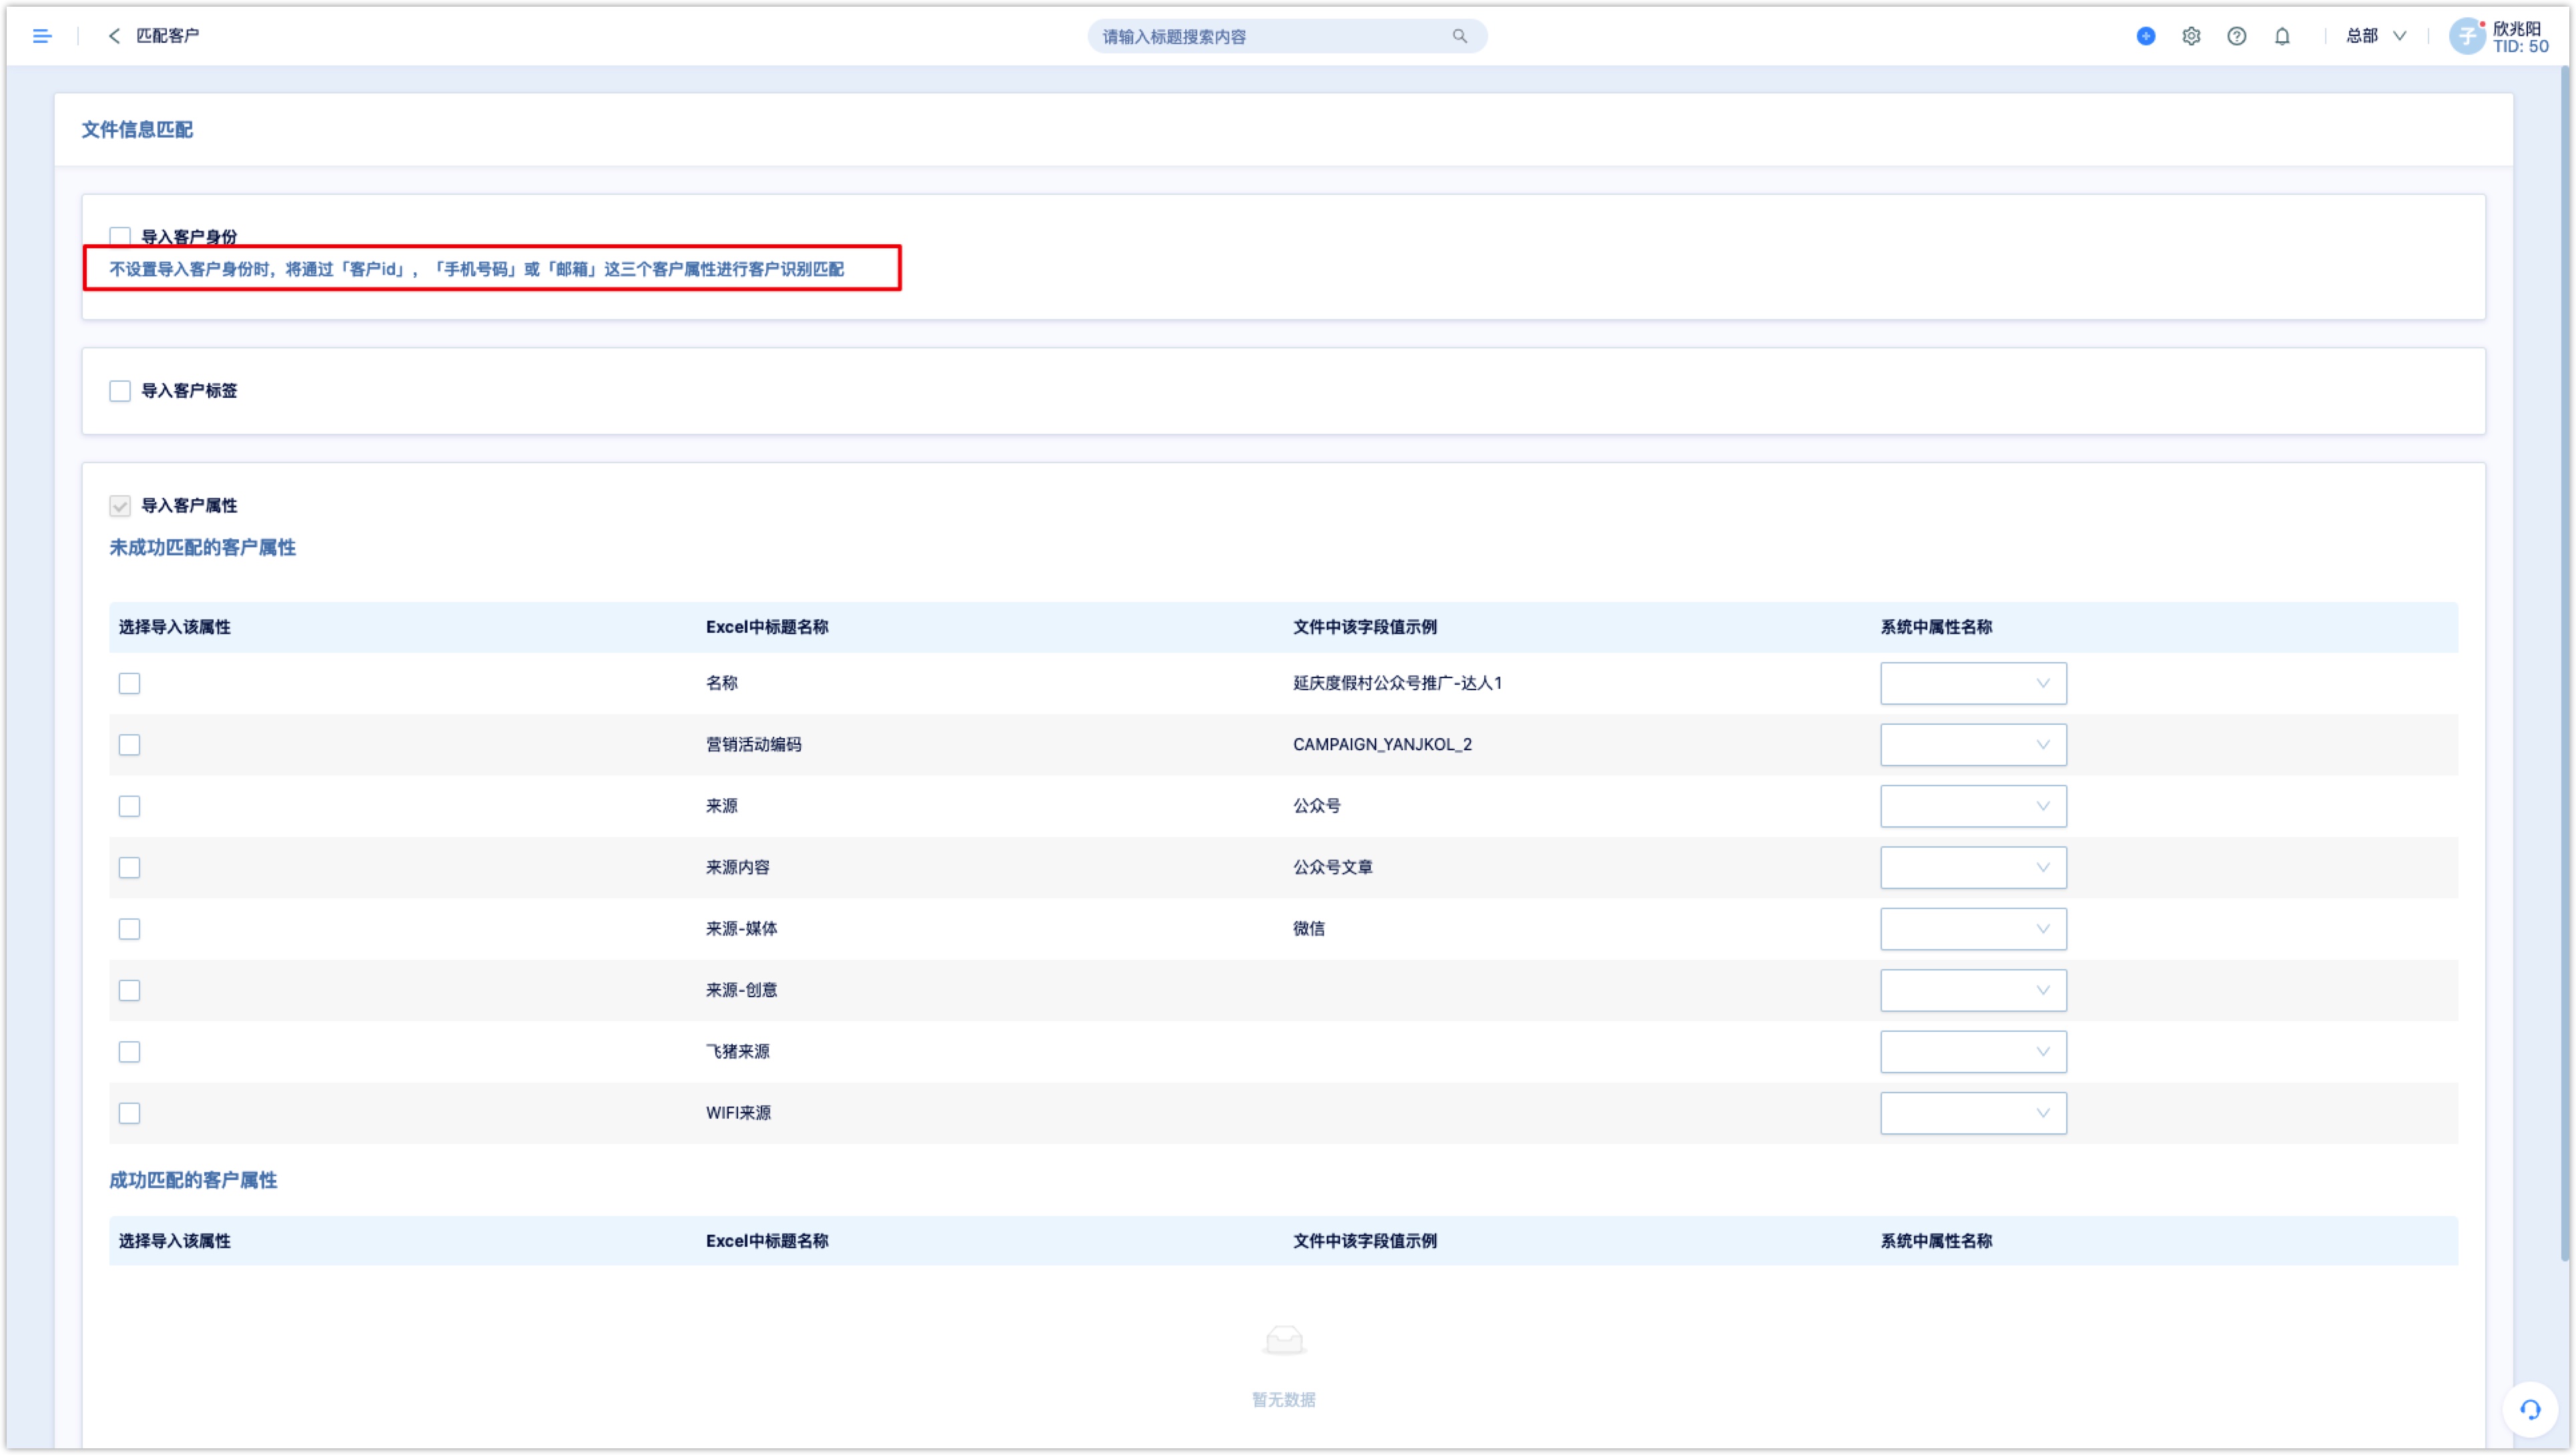
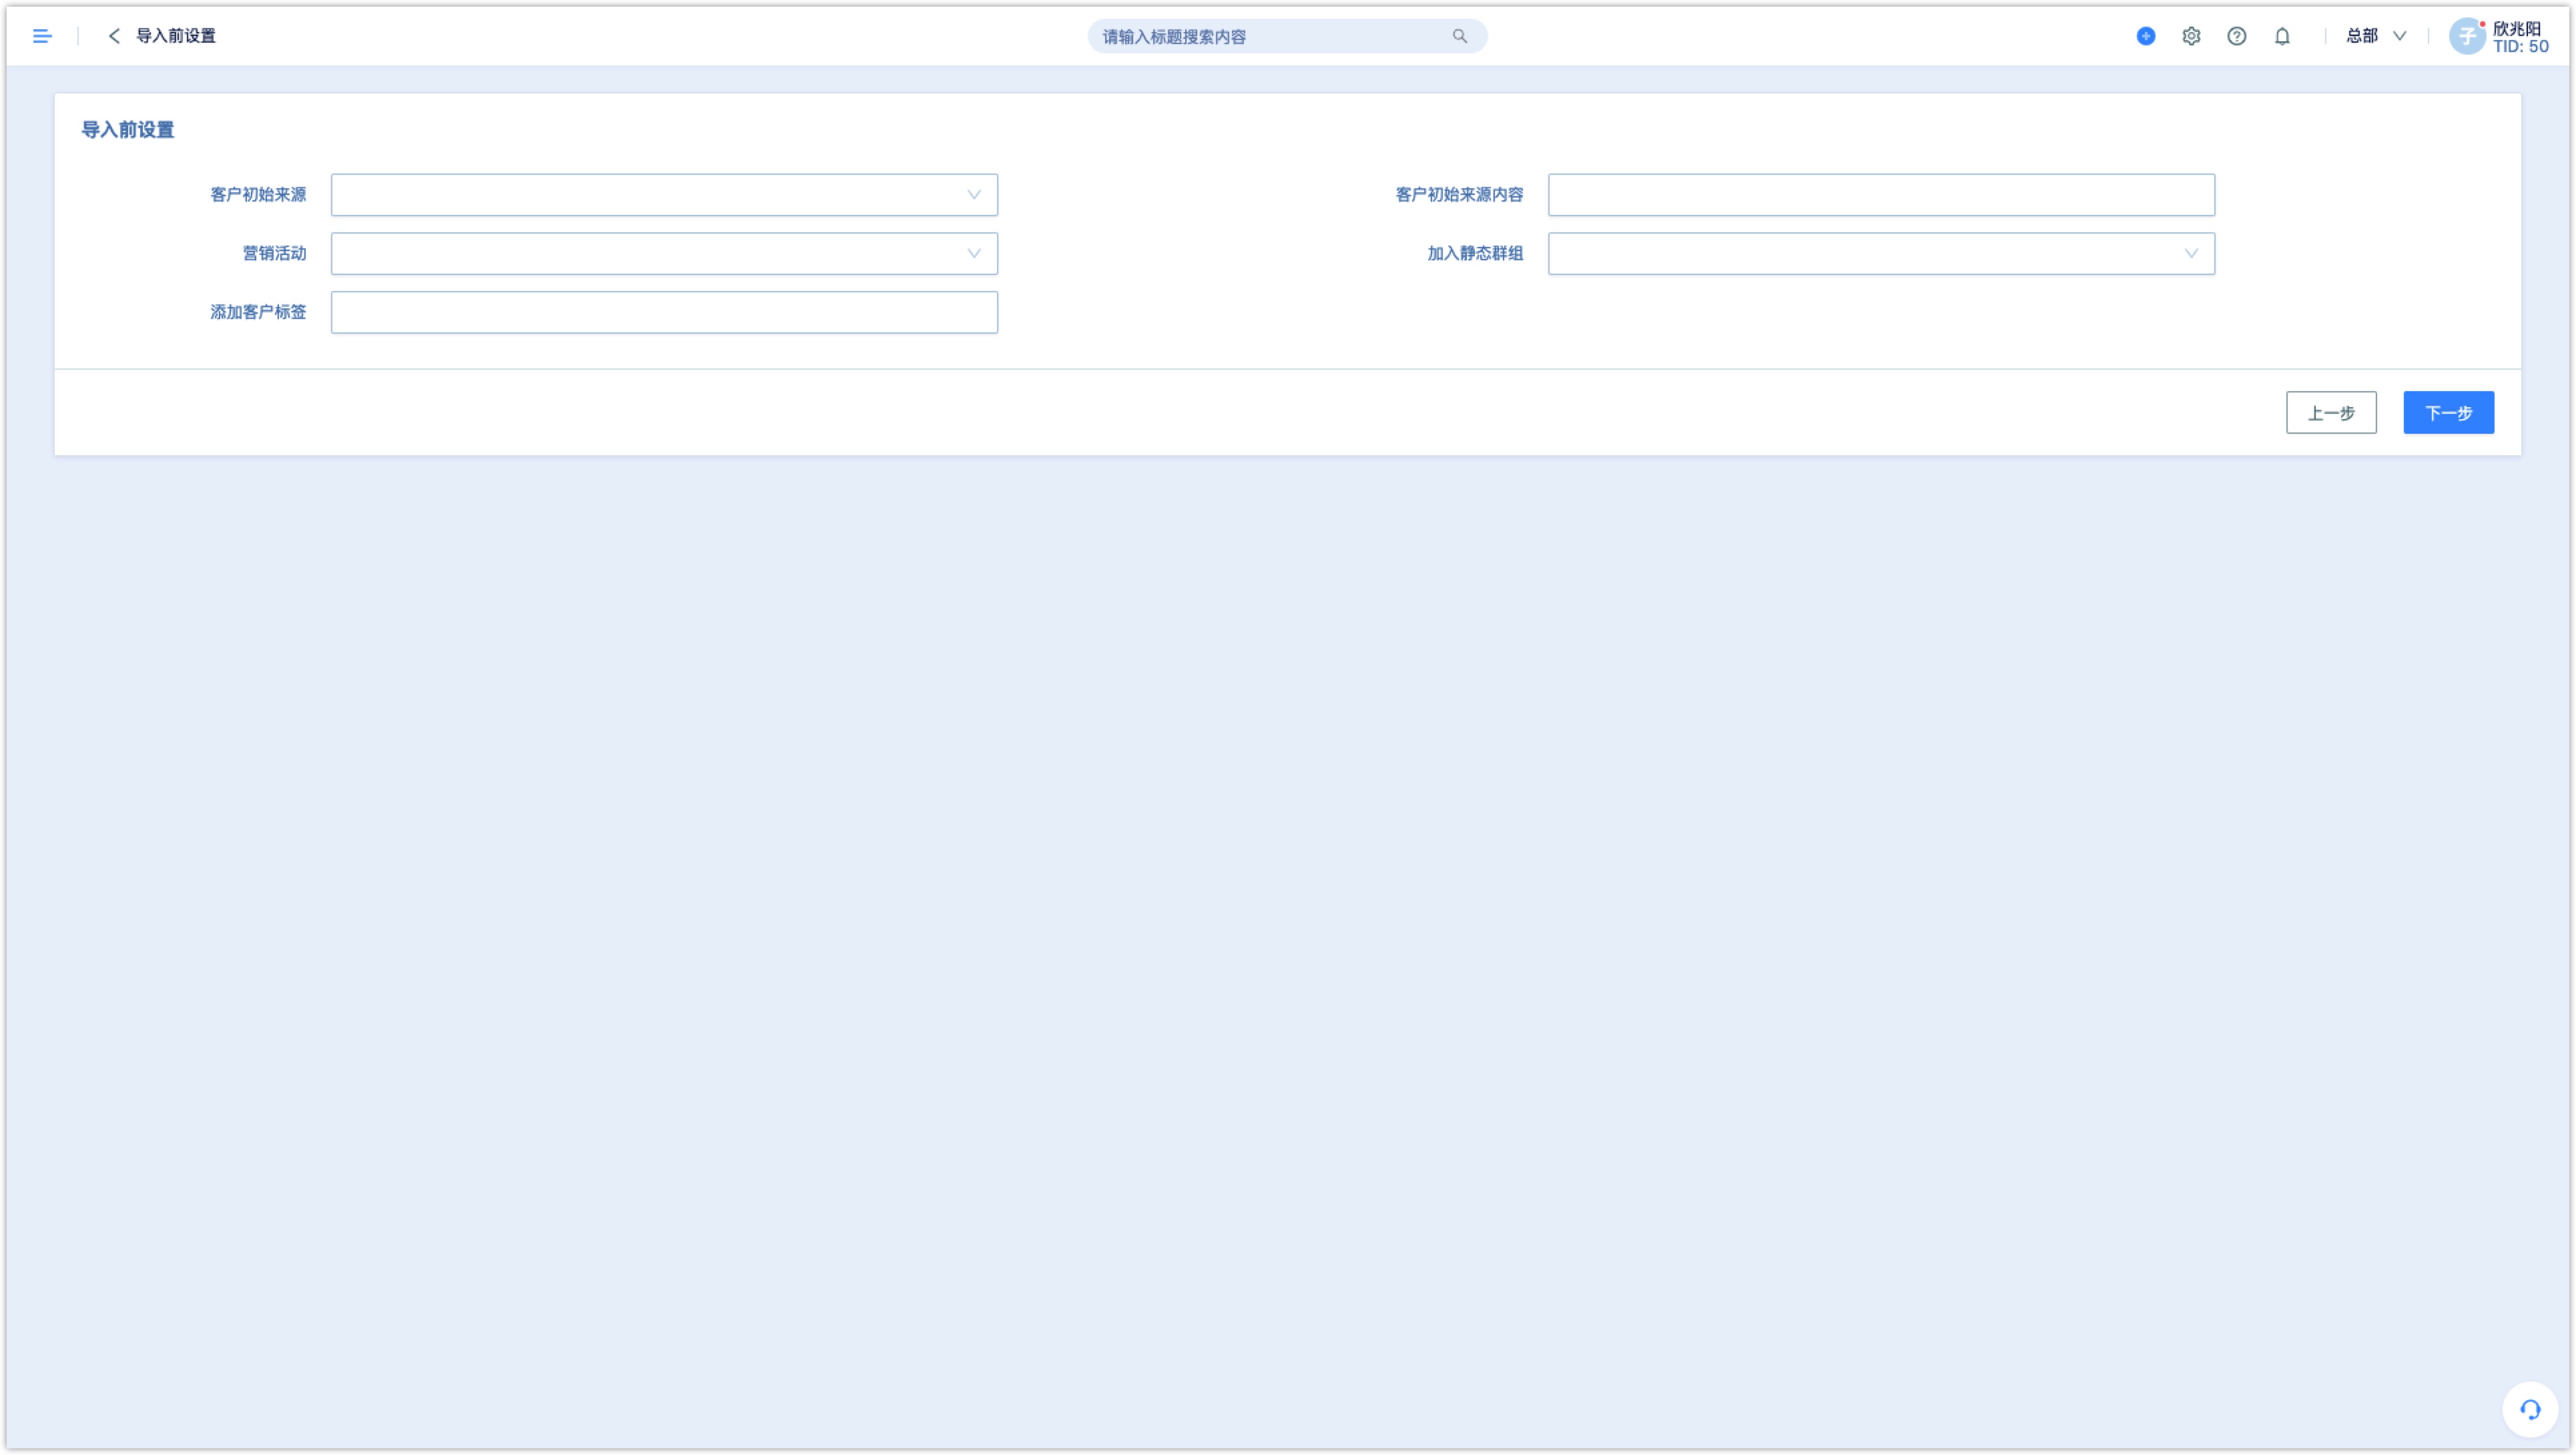
After matching completed, set up before importing, add sources, tags, joined marketing activities and groups. Click [Next] to start importing files. If importing fails, failure record could be downloaded to help review the reason for the failure.
2.2customer enquiry
There are two ways for filter, [simple filter] and [advanced filter], system defaults [Advanced filter] as interface of Customer List, for advanced filter, we can perform under multiple conditions and multiple groups of conditions, click the [And] button, filter condition could also be switched to [Or]. Select the conditions you need and click [query].
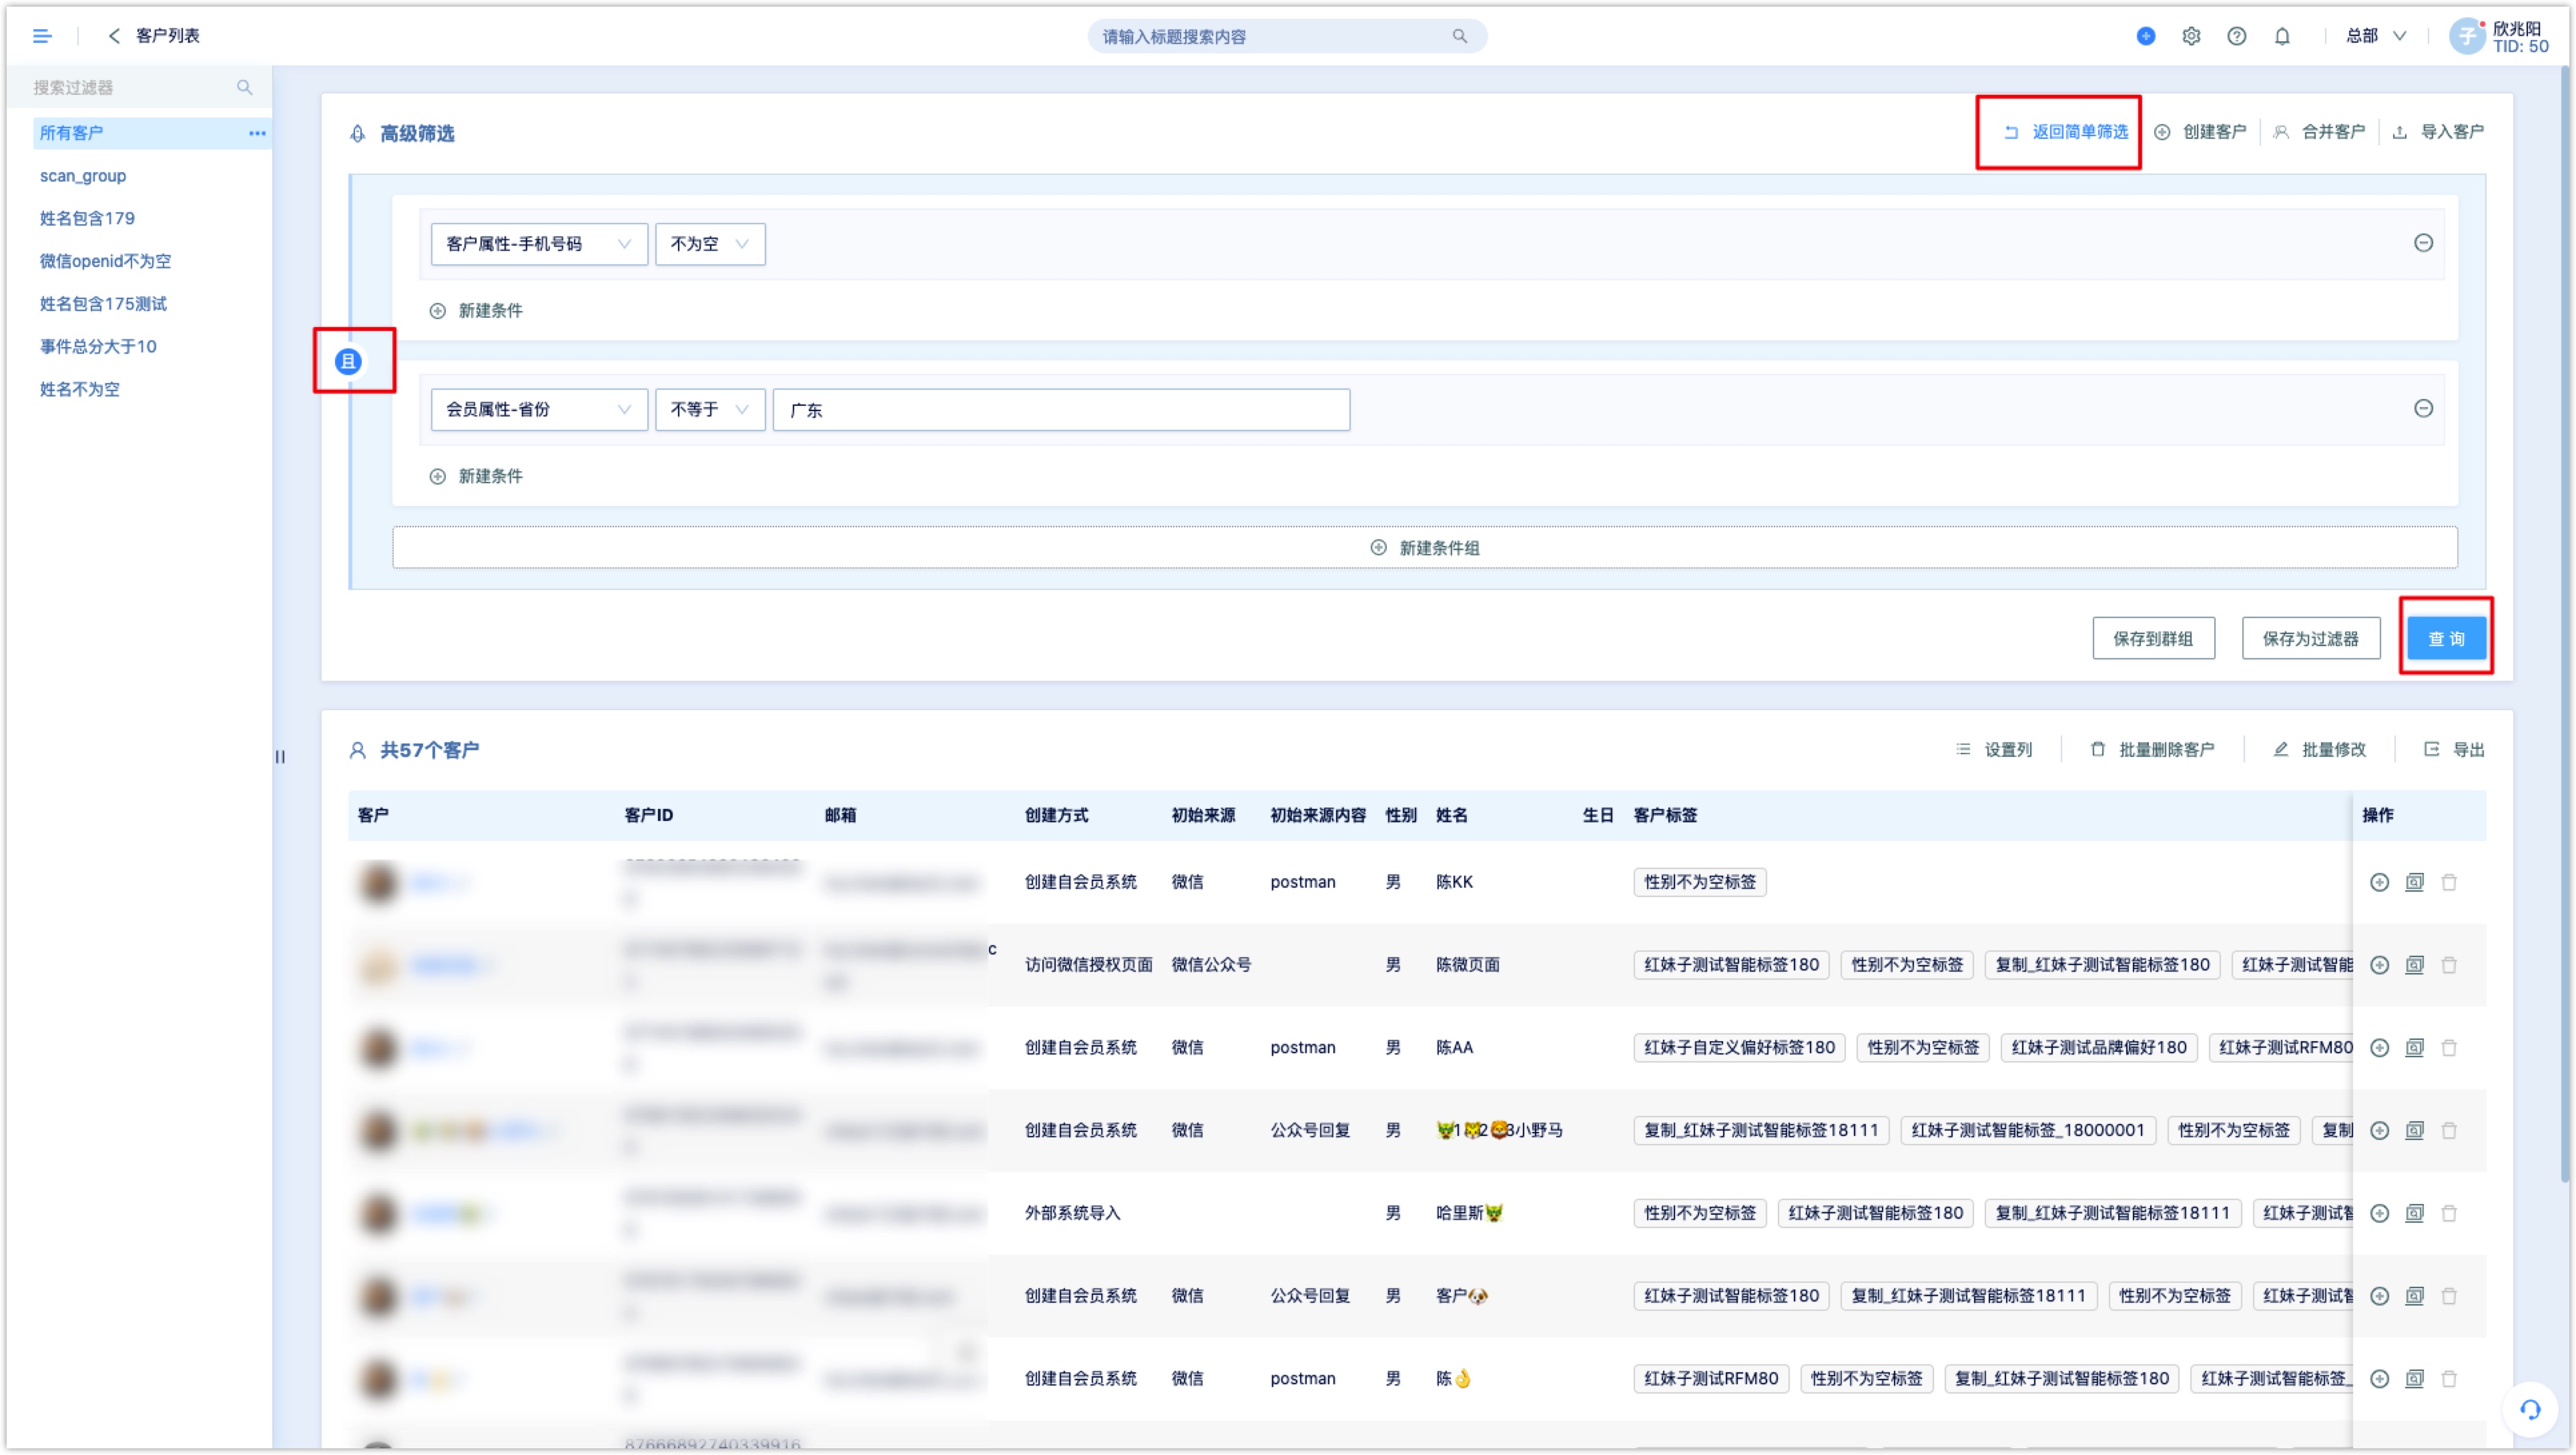
After filtering the customer who meets your criteria, you can save the customers to a group, or save the query criteria as a filter.
Filter:It is like a temporary customer group, clicking the saved filter allows to view the corresponding customers. Filters could also be renamed, copied, and deleted. Filter appears on the left side of the customer list.
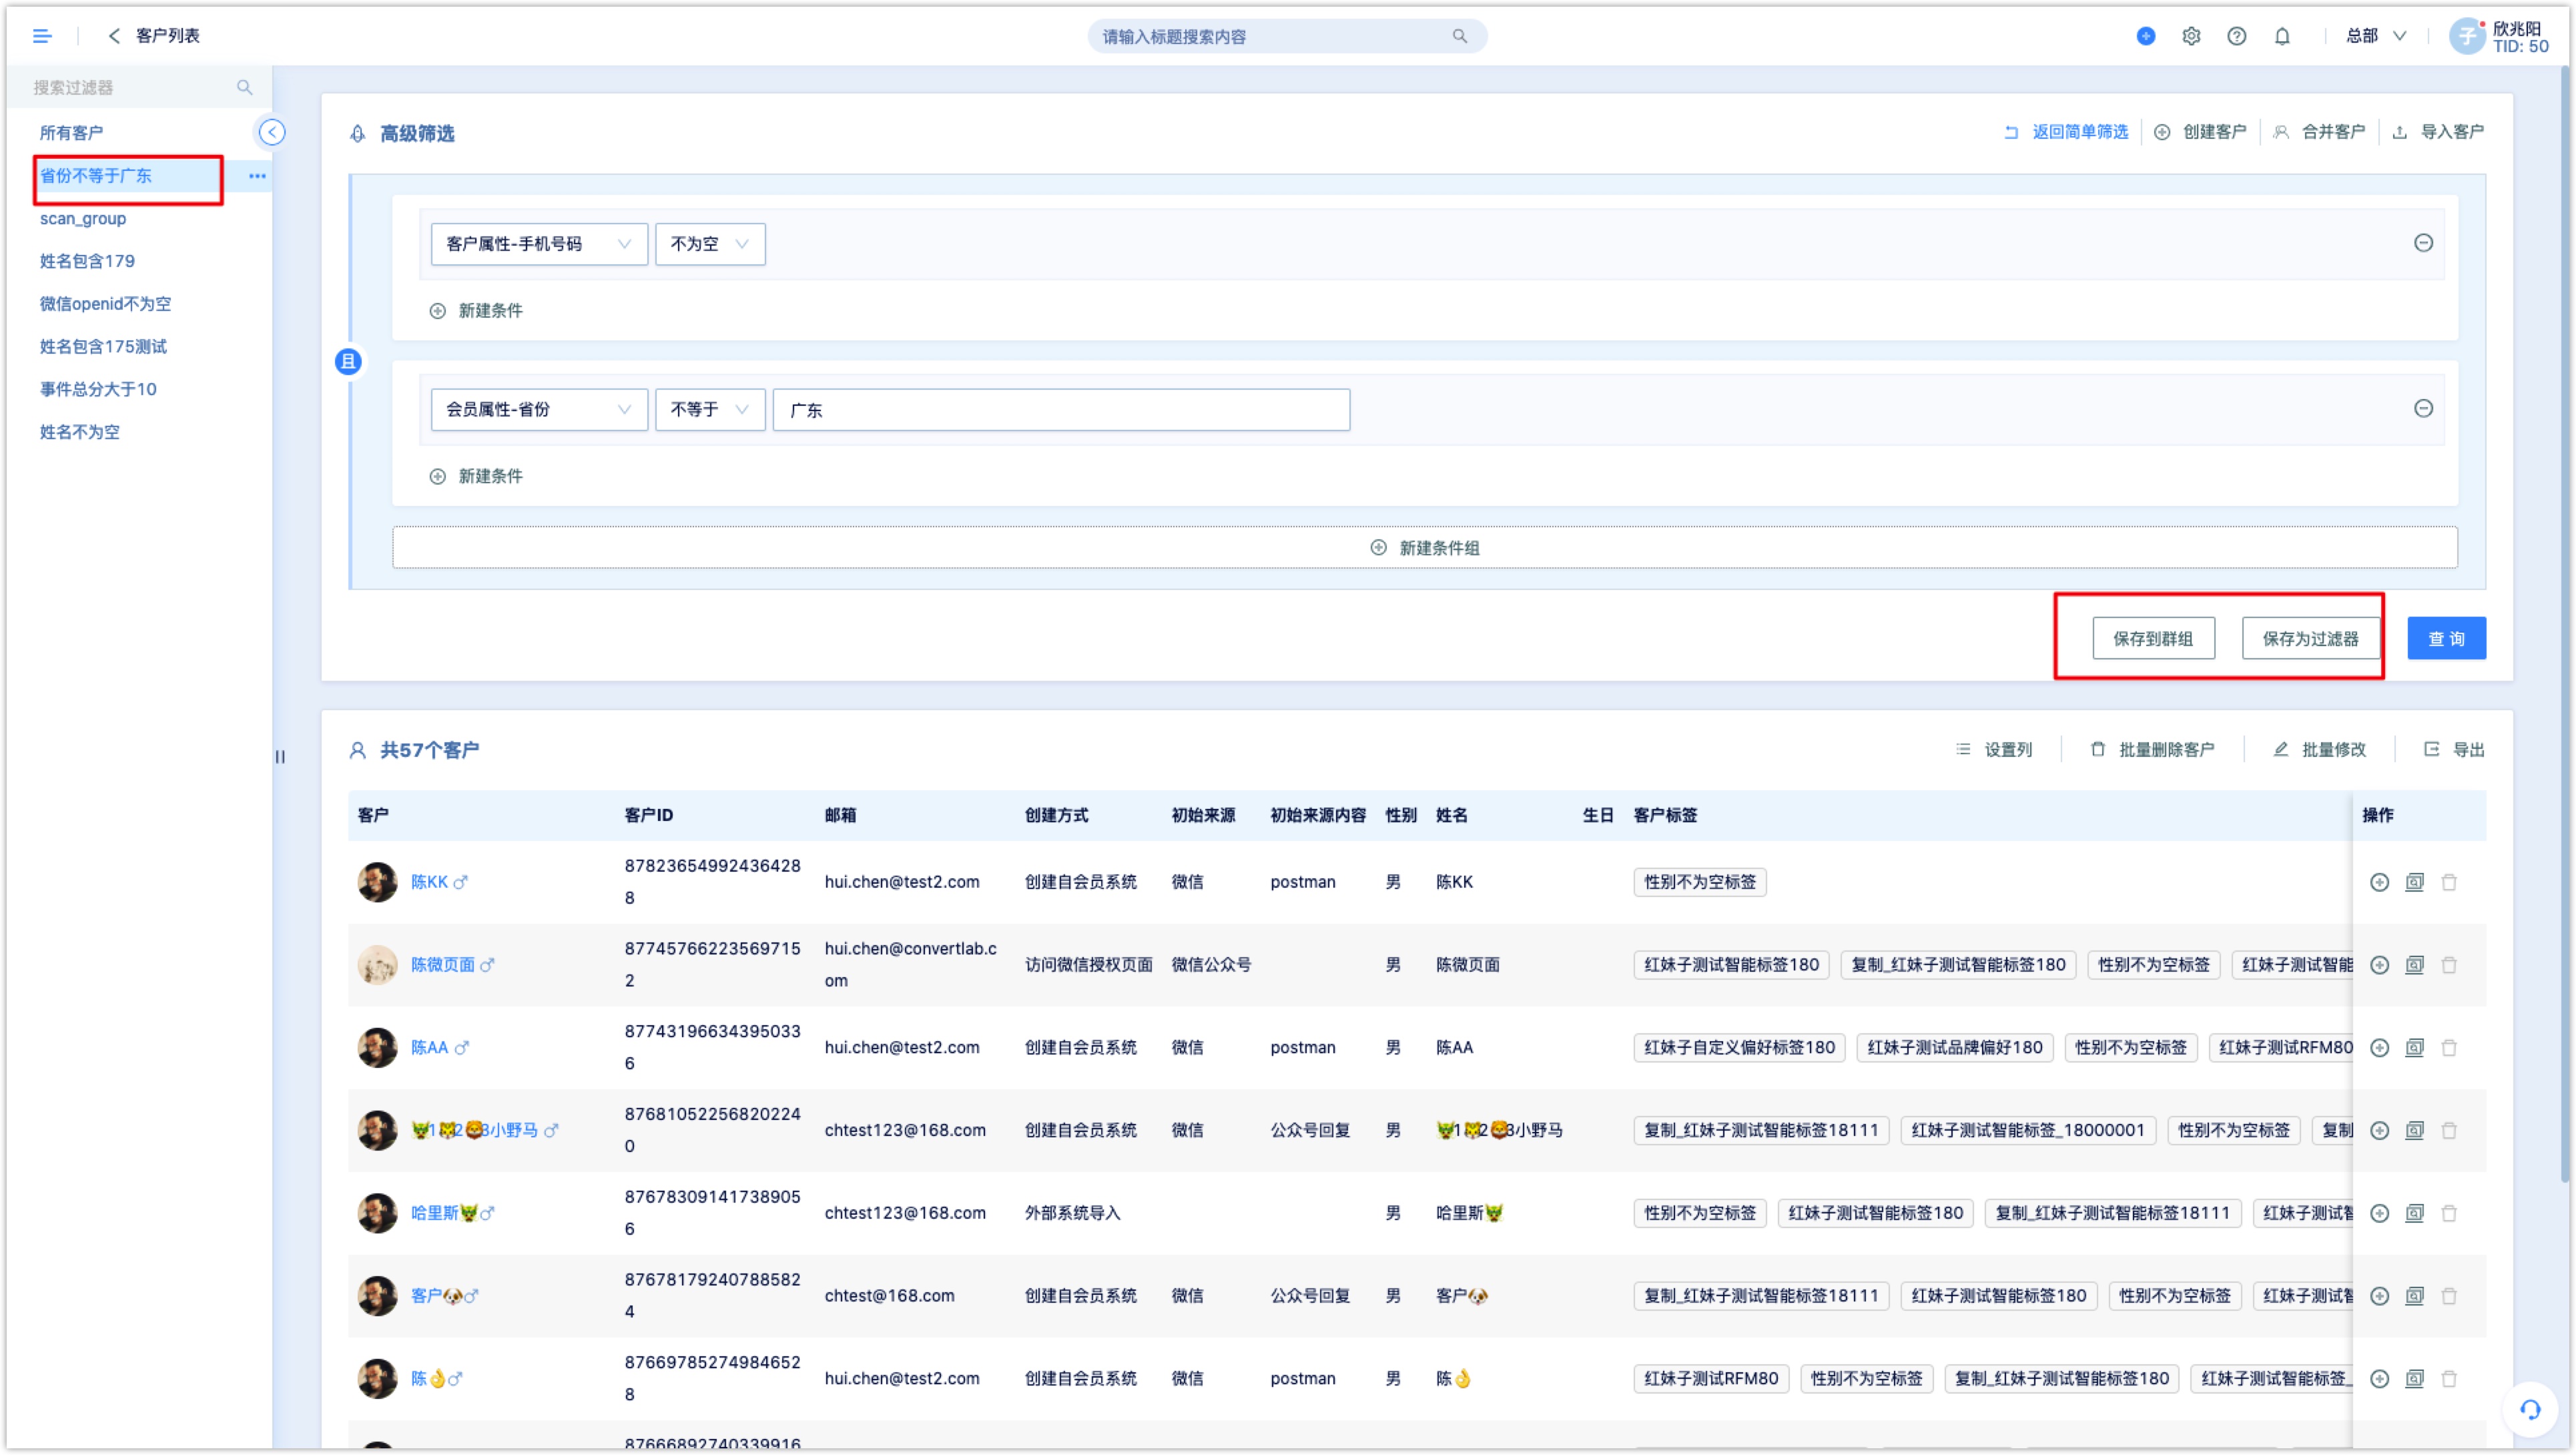
Customers who meet the query criteria could be modified in bulk., deleted in bulk, exported and created tasks.
2.3Batch modification
Batch modification can modify customer attributes and increase or decrease customer tags or WeChat tags.
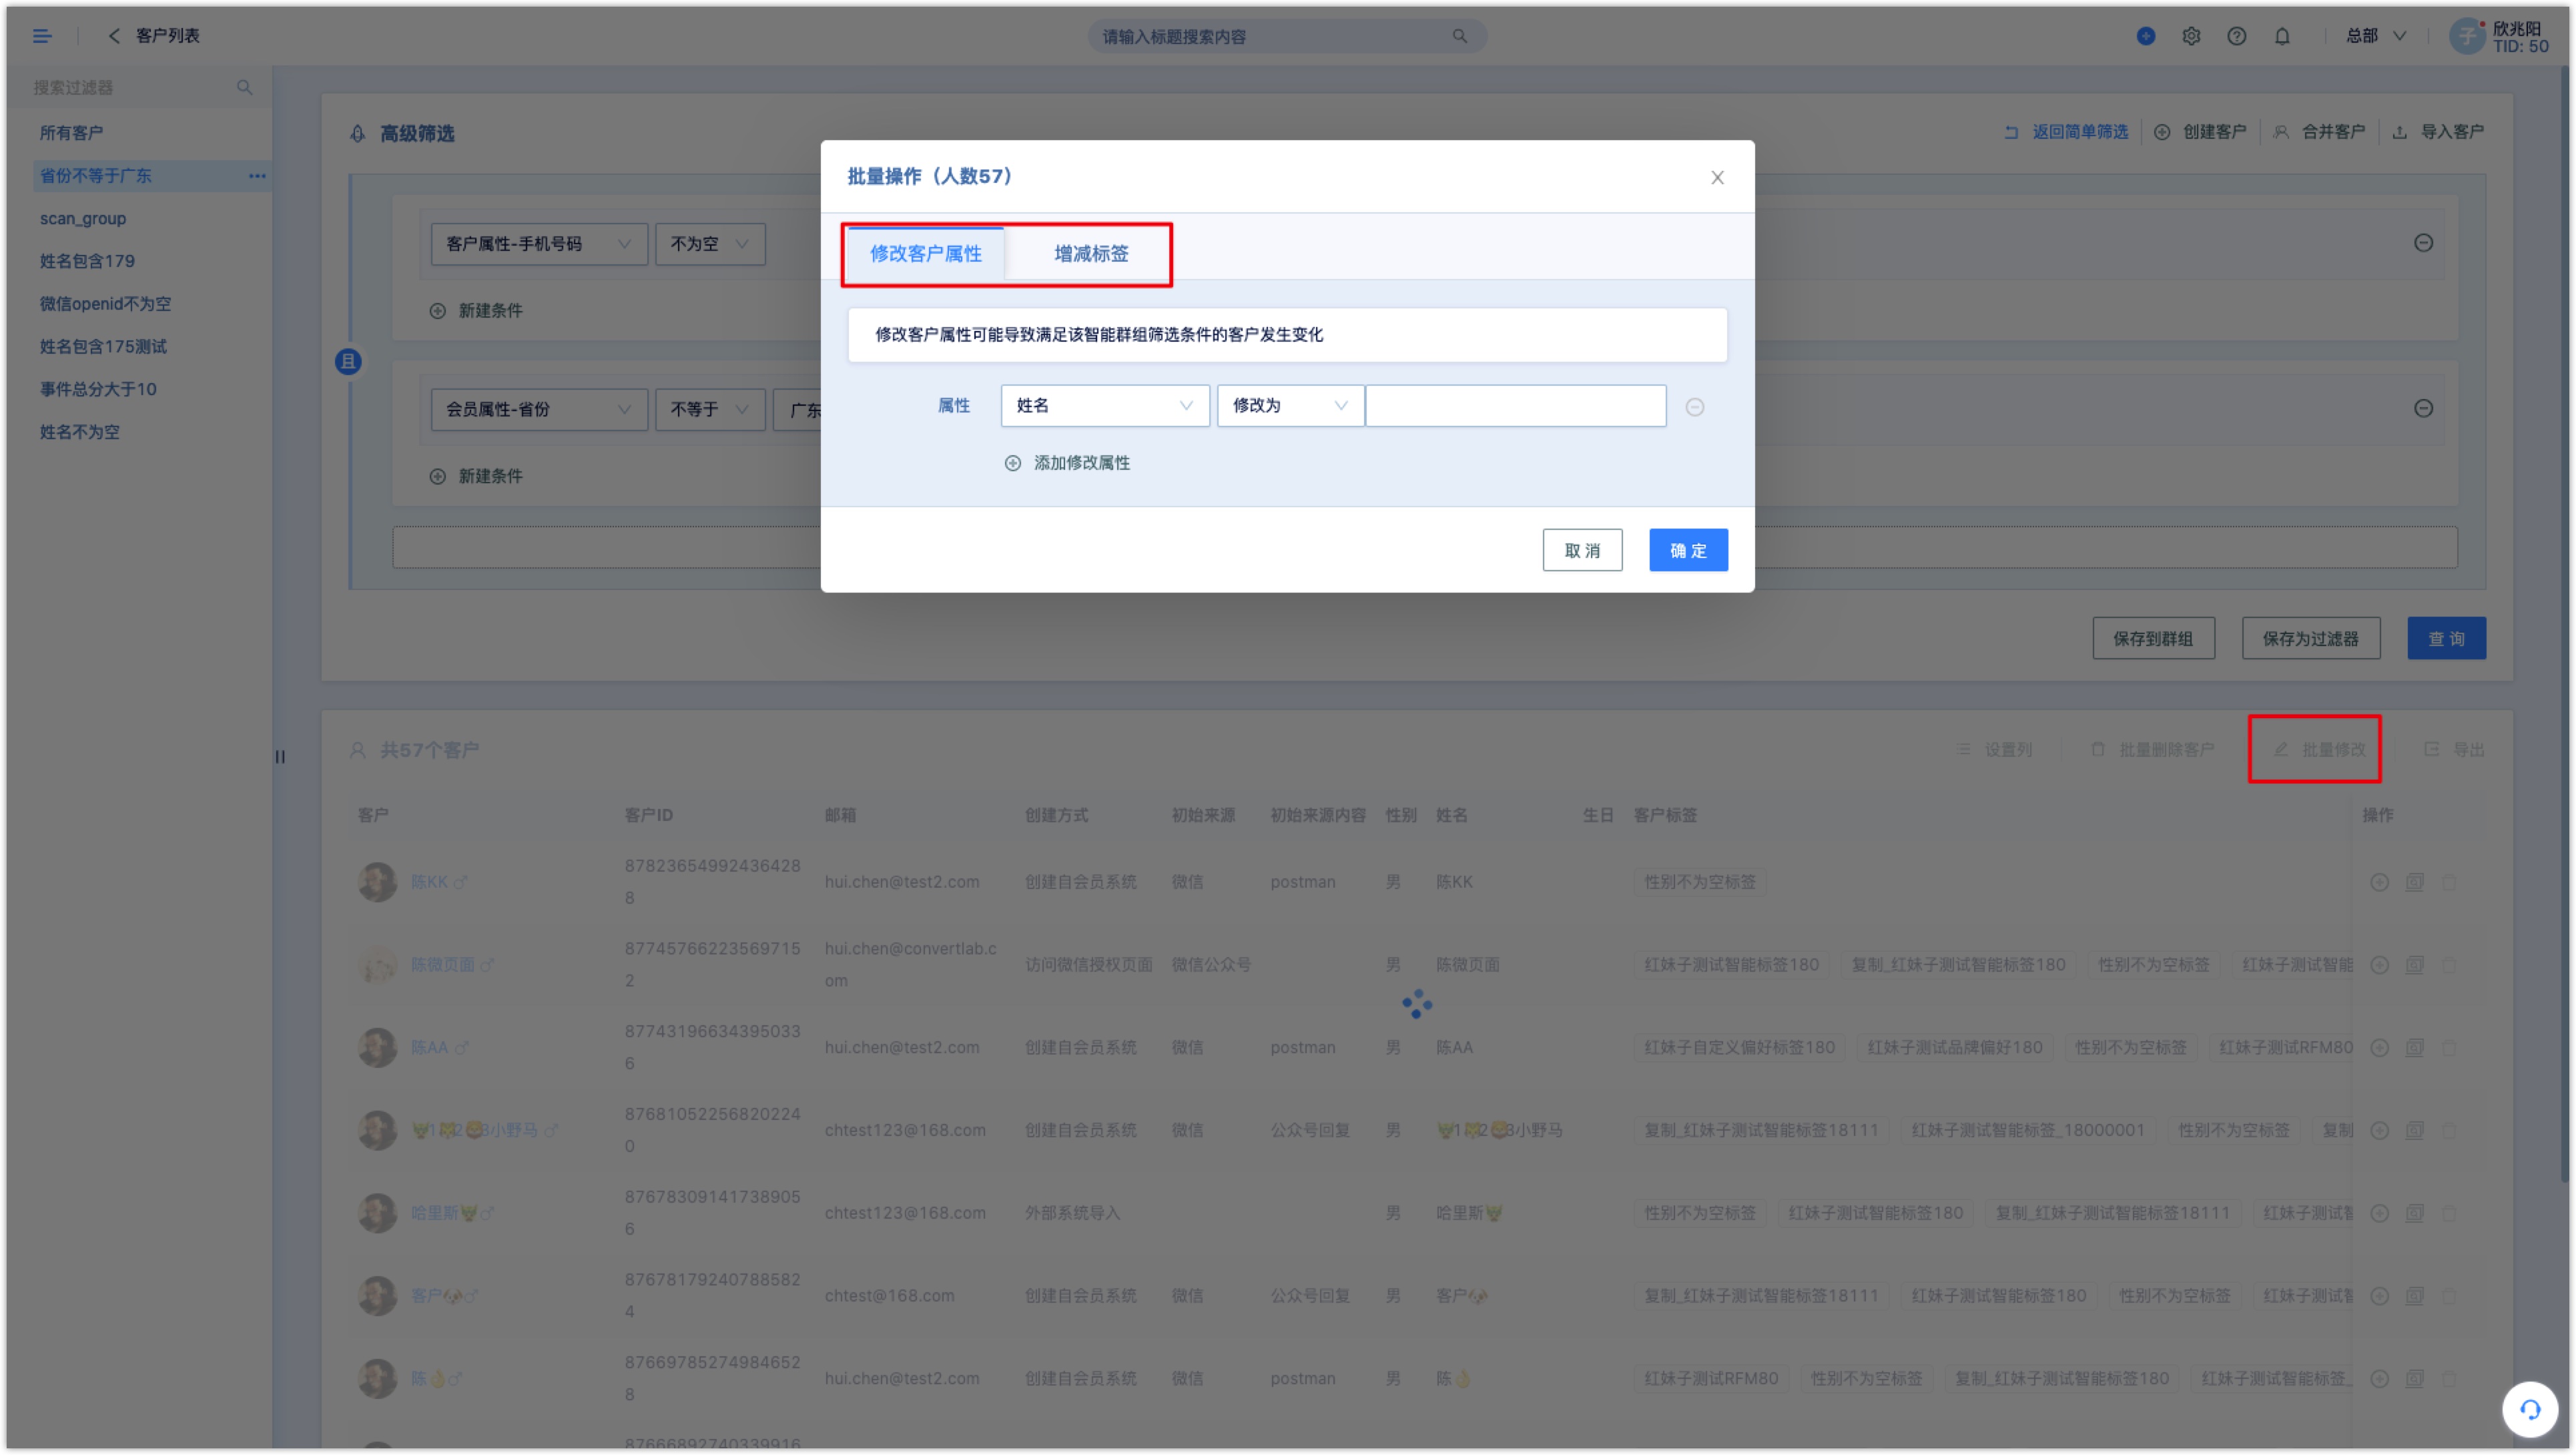
2.4Batch delete customers
In the advanced filter, filter out customers under combination conditions, click [batch delete], the system will prompt the batch delete operation statement, please read it carefully, and tick “I have carefully read and agree to the statement”, click [enter the next step]. Up to 100,000 pieces of data at a time could be deleted at a time .
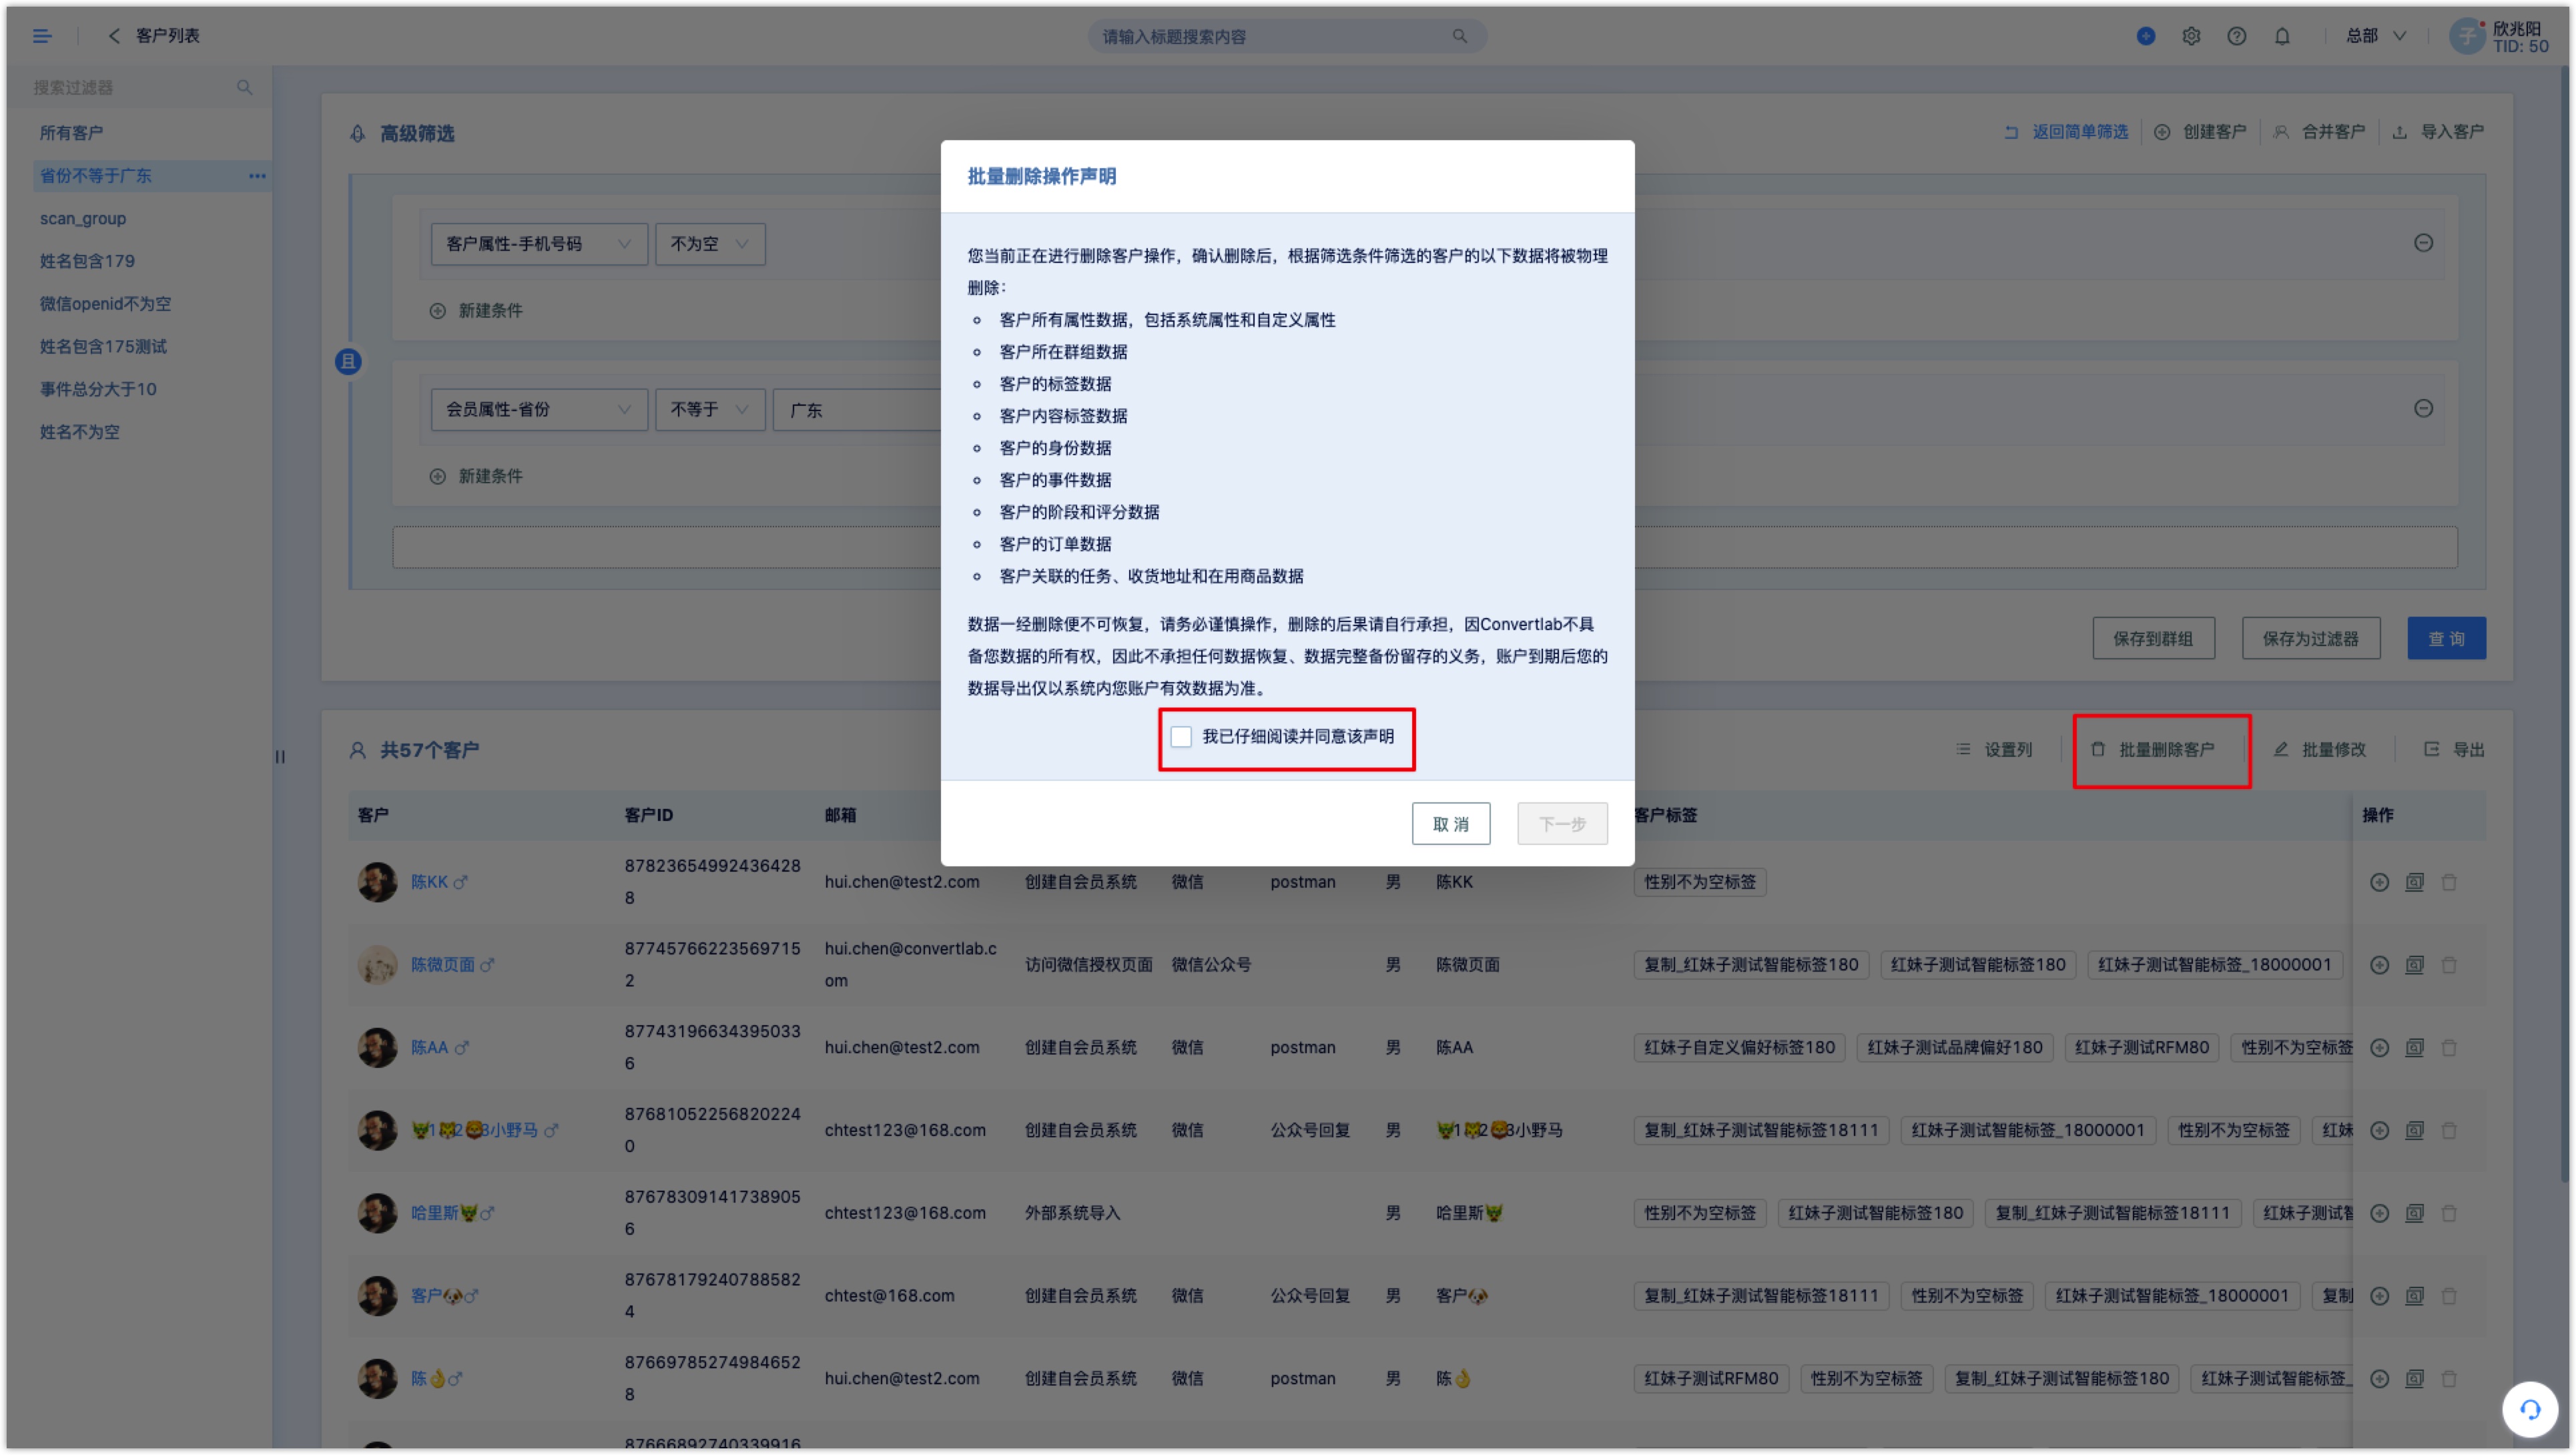
The pop-up window will display the number of customers who have been deleted, and will require you to enter the reason for deletion, please fill the reason for deletion truthfully and at least 10 characters should be filled, then click [OK], the system will delete all filtered customers.
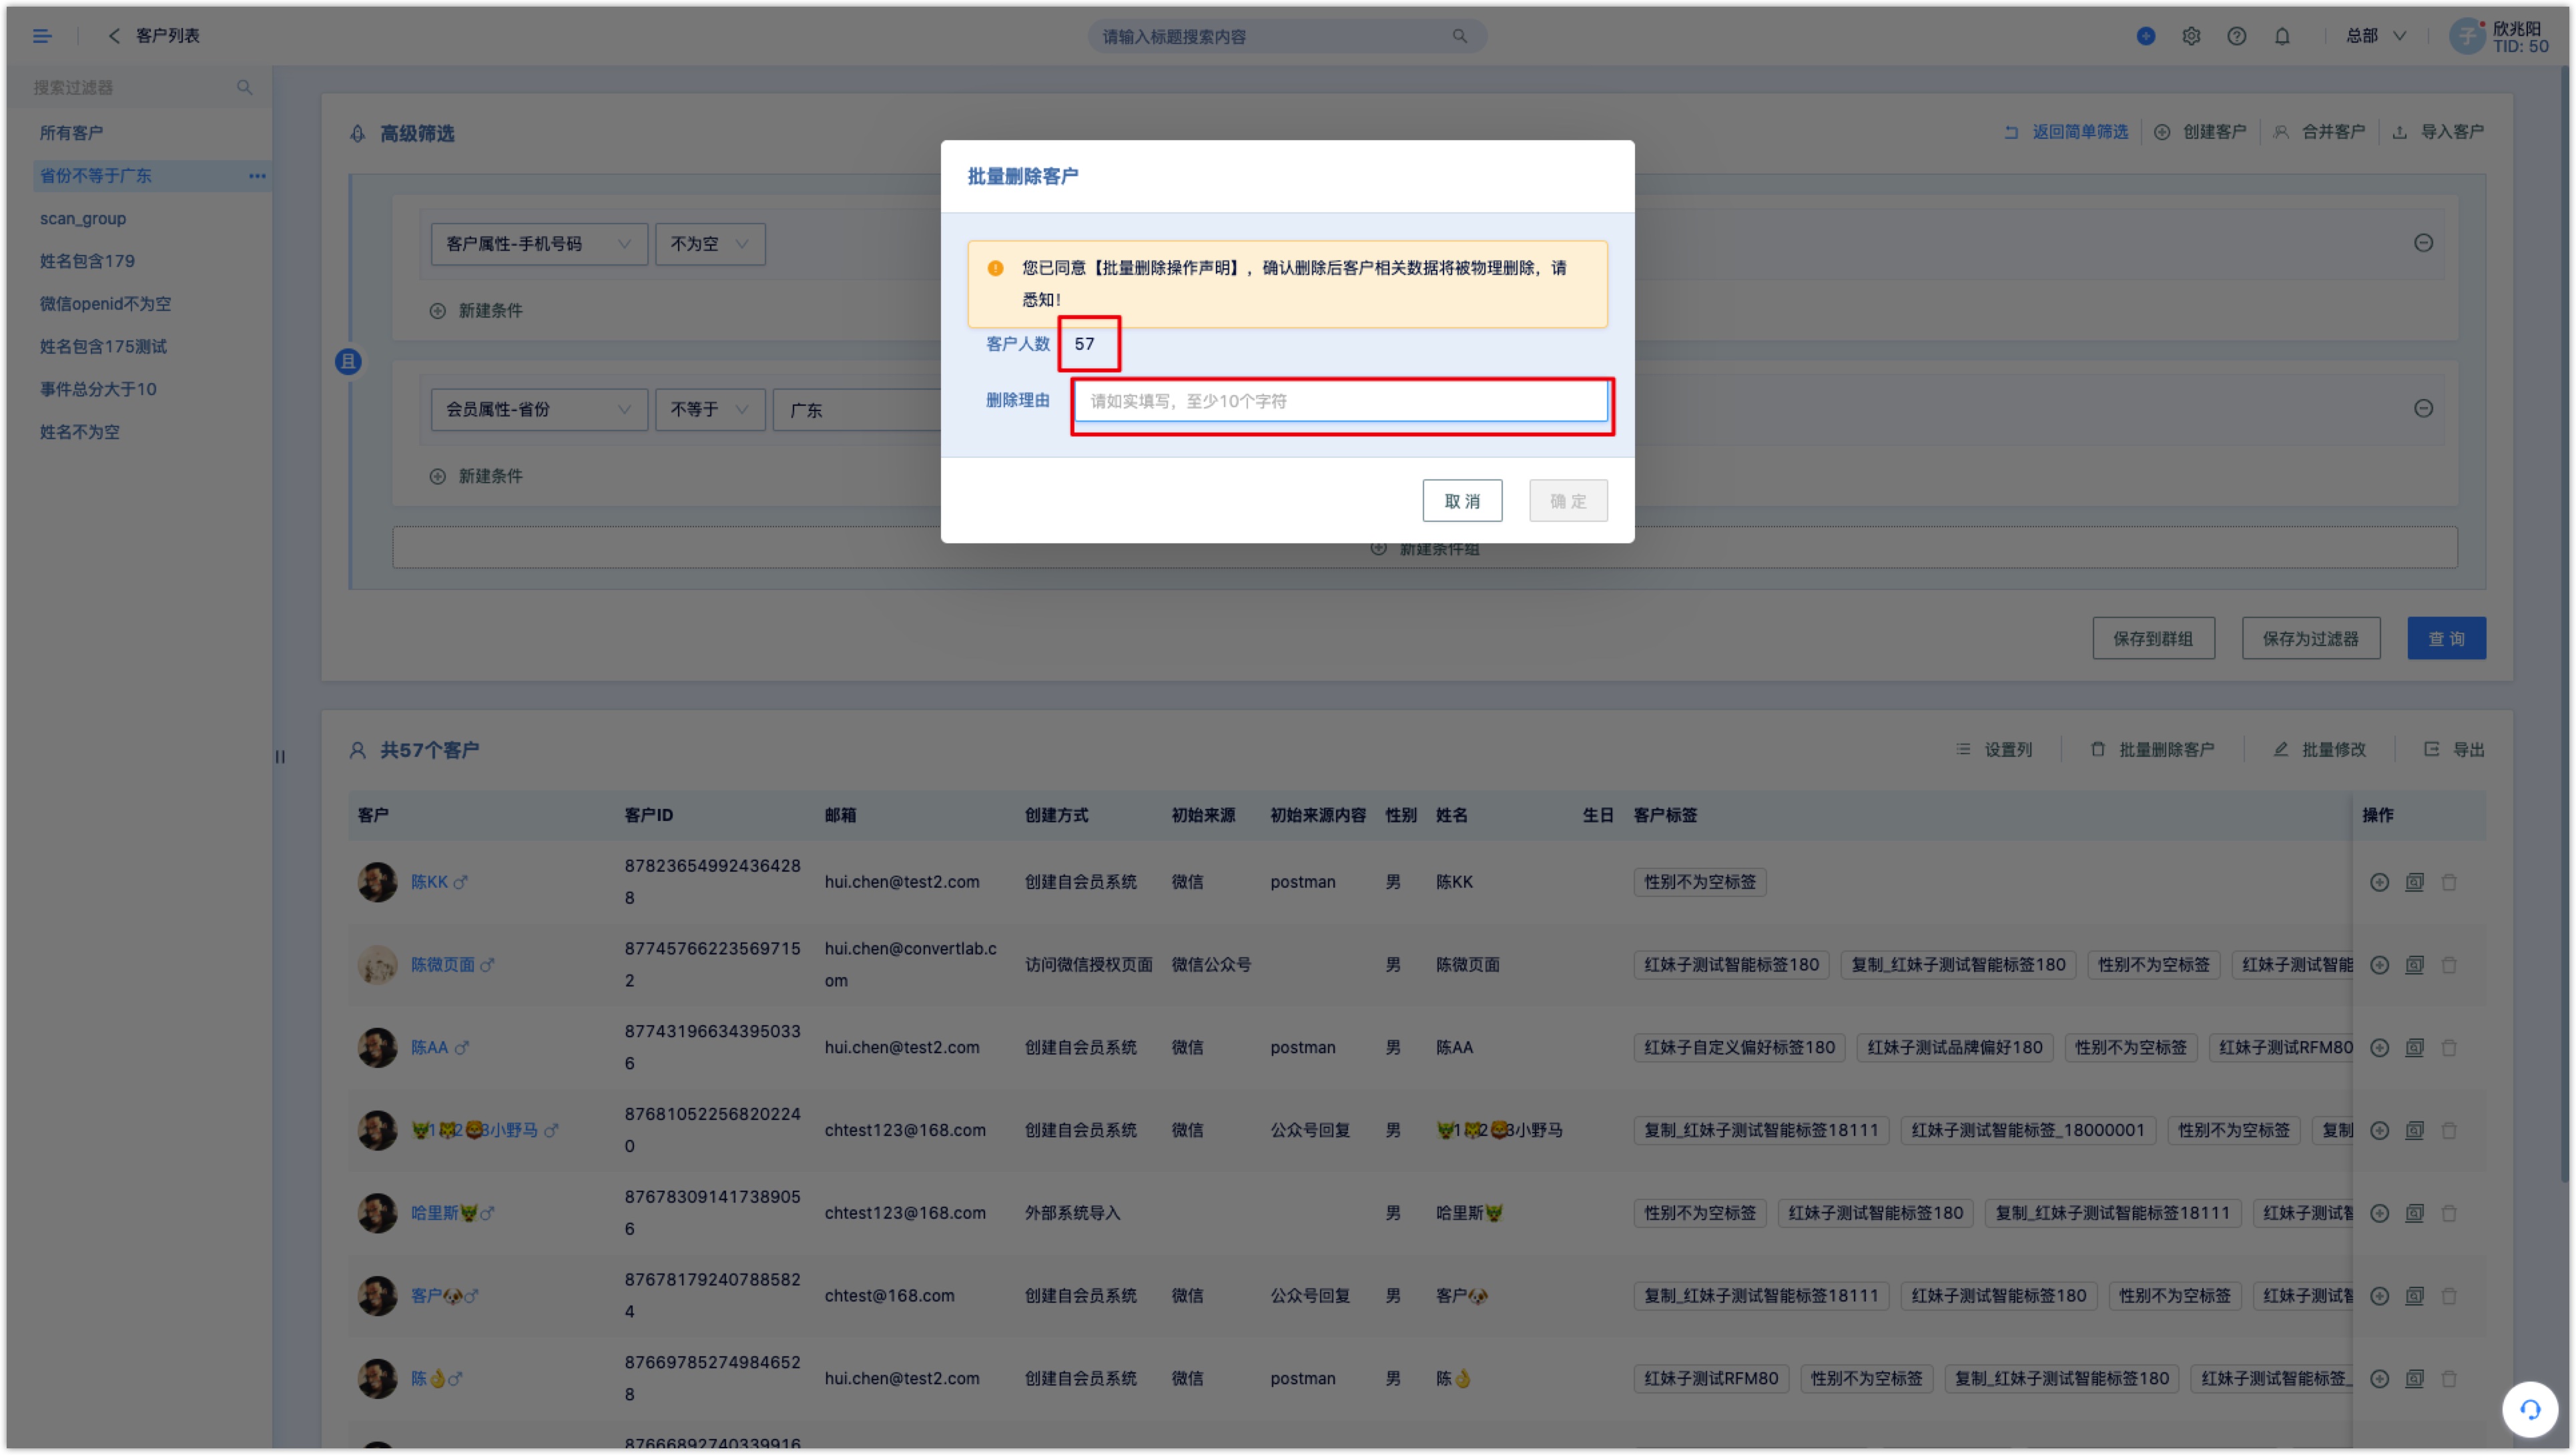
The system can bulk delete customers, but this operation has certain risks, customer data can not be restored after deletion, please operate carefully!
2.5customers exporting
DM Hub supports exporting customer data, customer attributes, customer identities and customer labels (Exporting for customer events and customer orders are not supported), after the file is generated, it could be downloaded in the [Settings Center-Export data]. Up to 1 million pieces of data could be exported at a time.
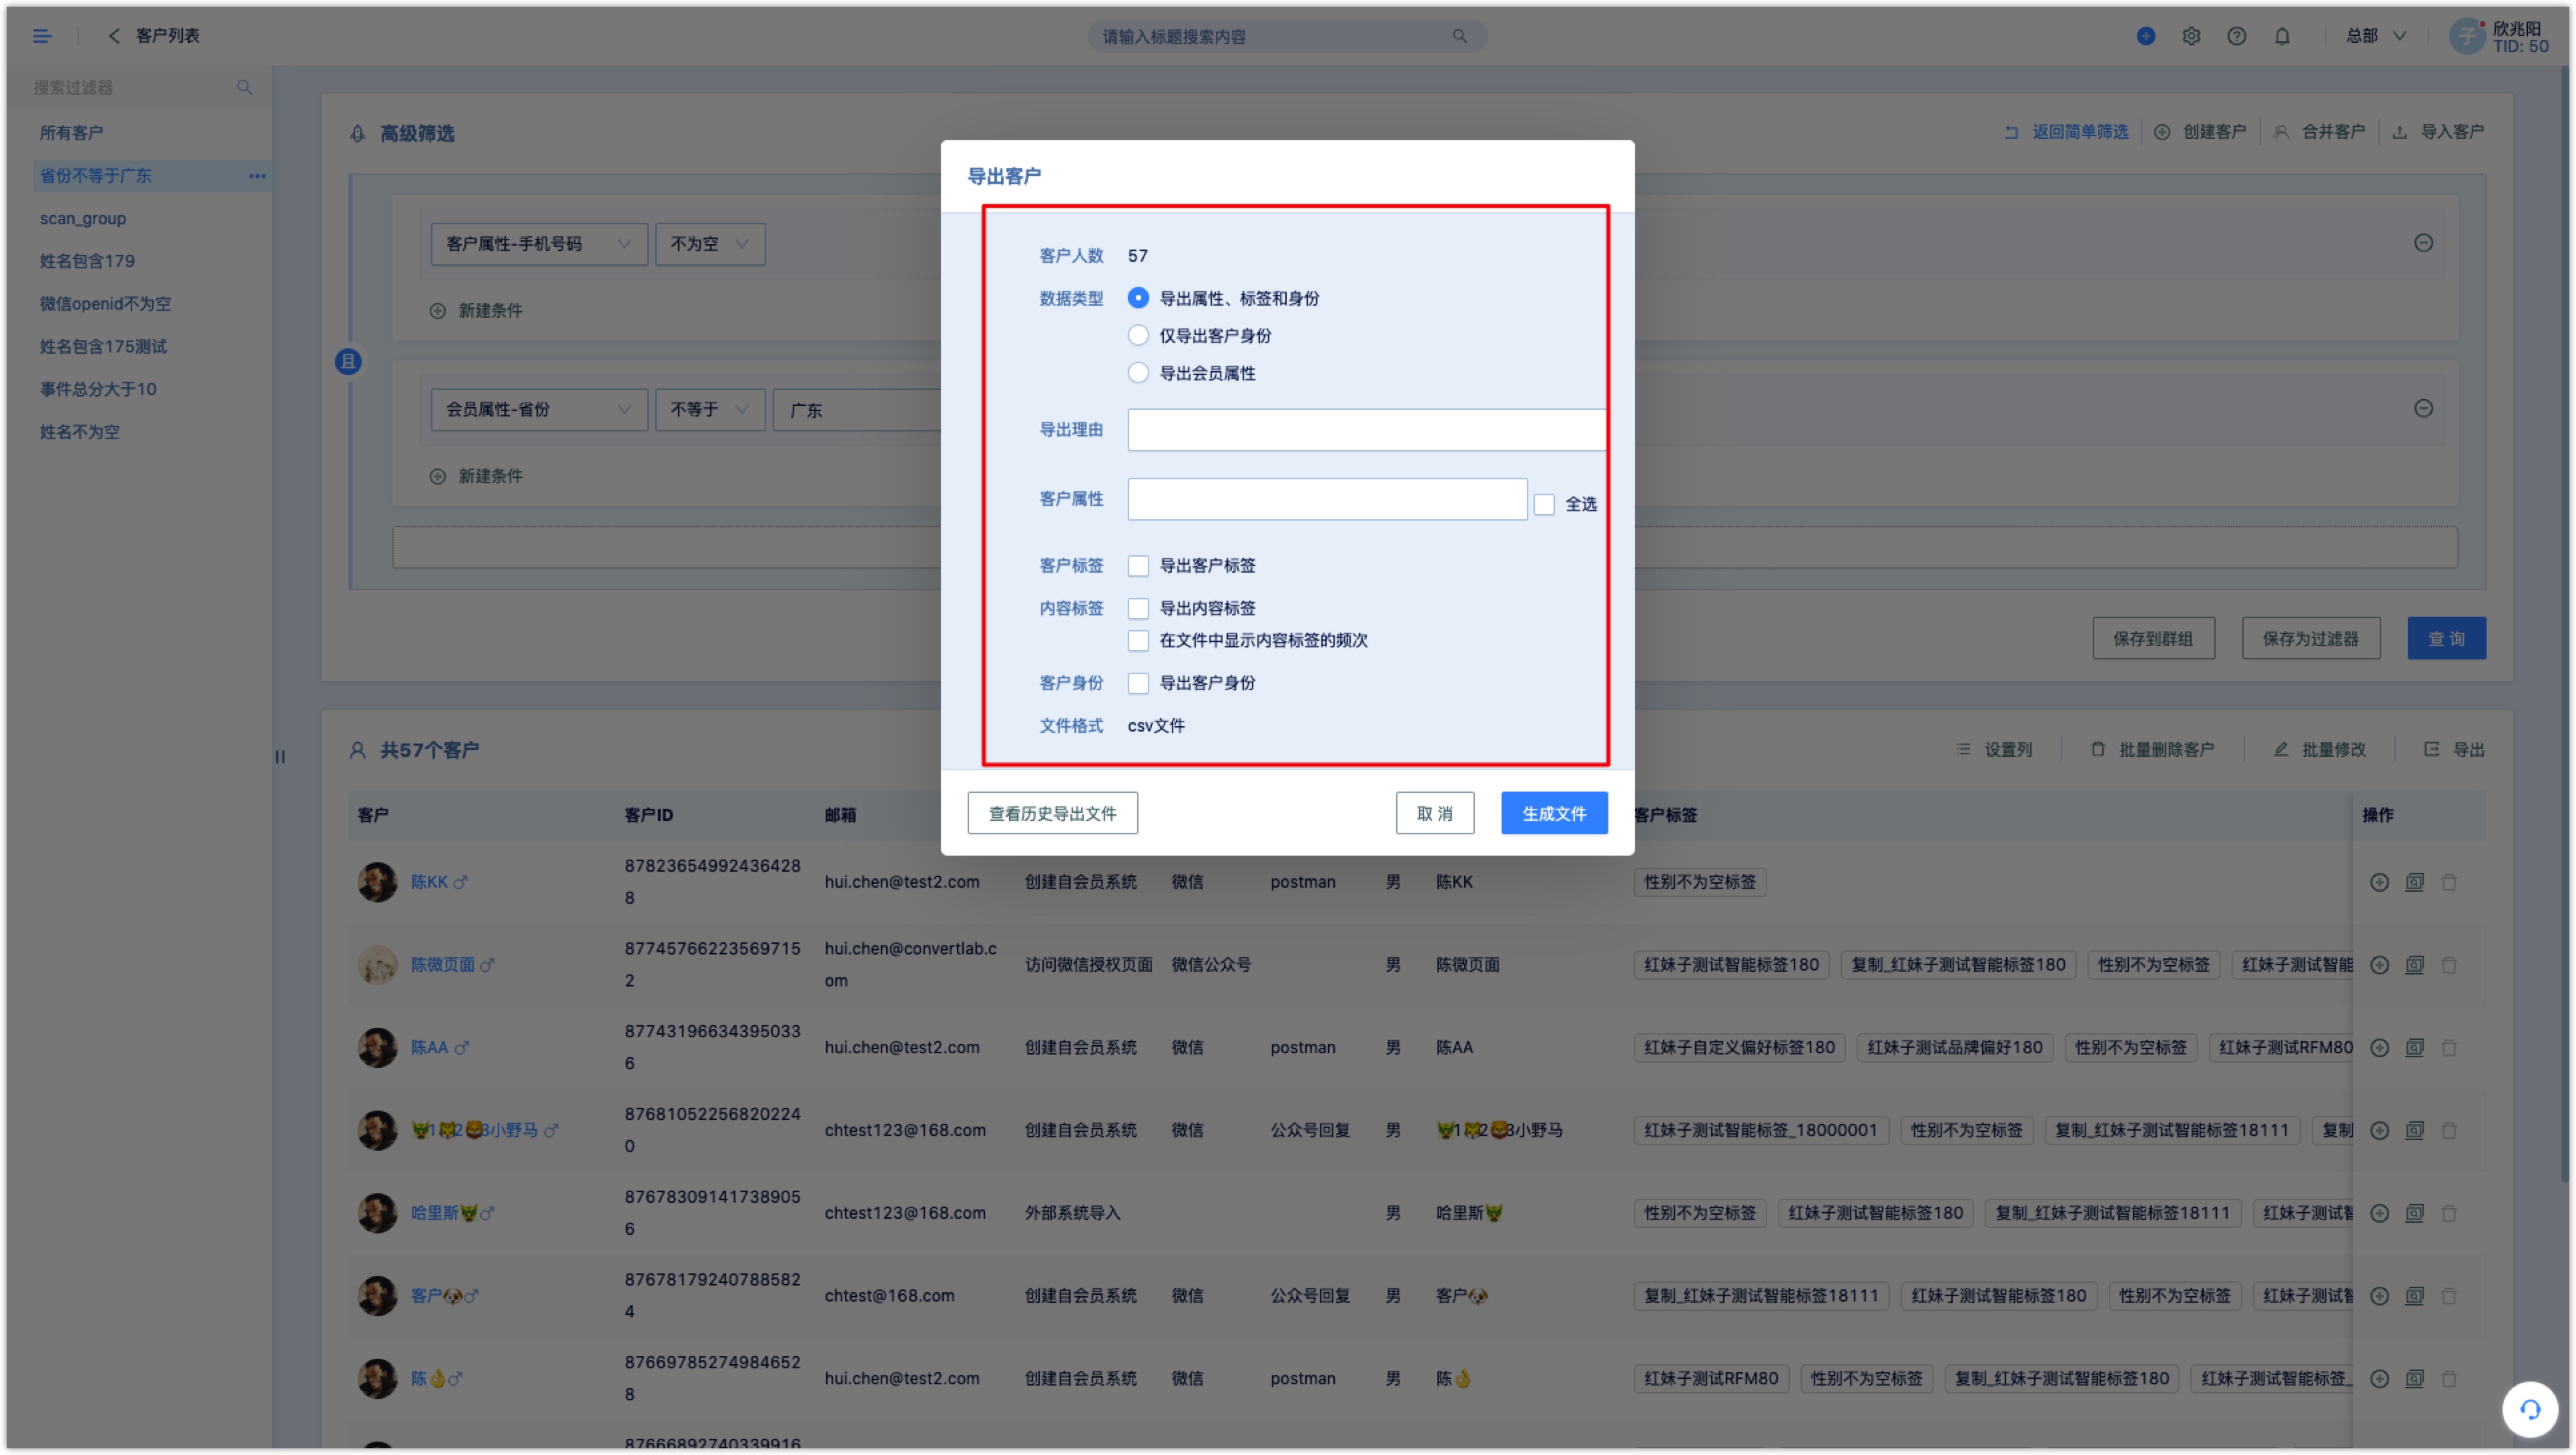
2.Customers Merge
Customer merge refers to the system which already exists two customers: customer A and customer B, because they have certain key information (such as mobile phone number, e-mail addresses) consistent or similar, they can be merged into one customer (provided that the two customer identities are not conflict, otherwise the merger would fail). For more details, jump to customer consolidation.
3.Customer details
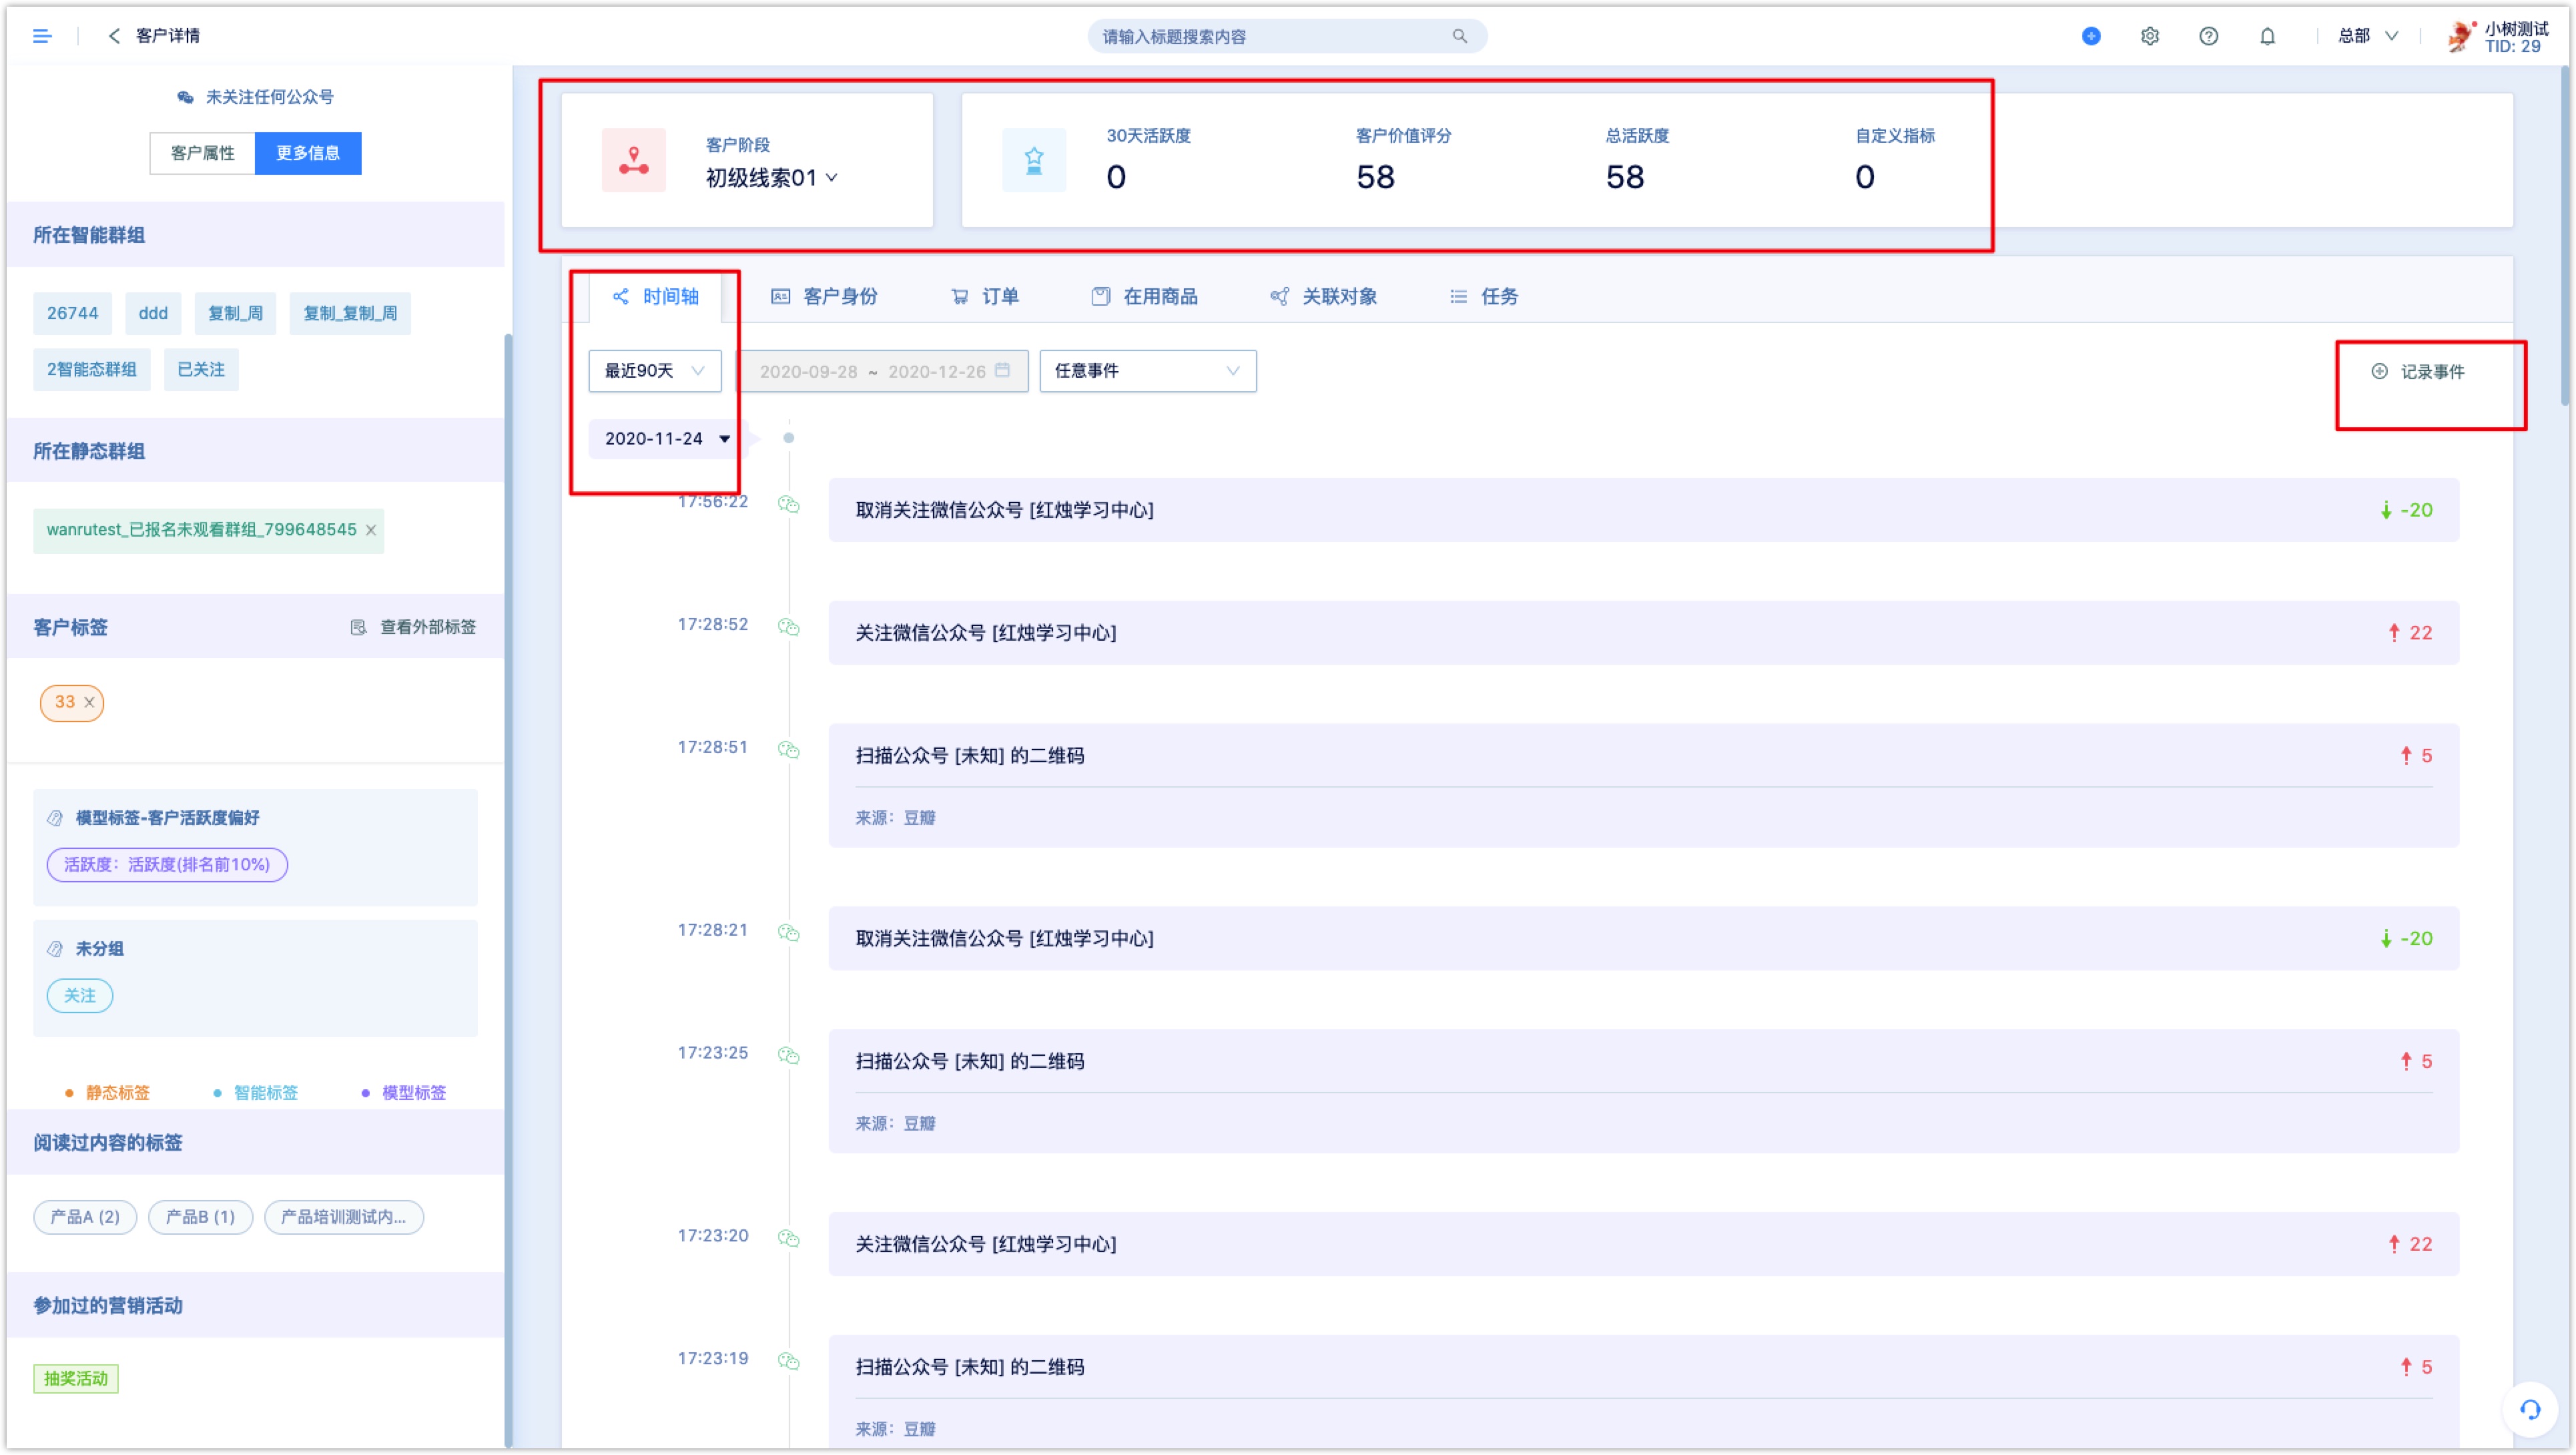
After finding an eligible customer from the customer list, click on the customer's avatar or name to enter the customer detail page, the customer detail page shows the customer-related attribute information and other information.
3.1 Attriubutes
- Customer attributes
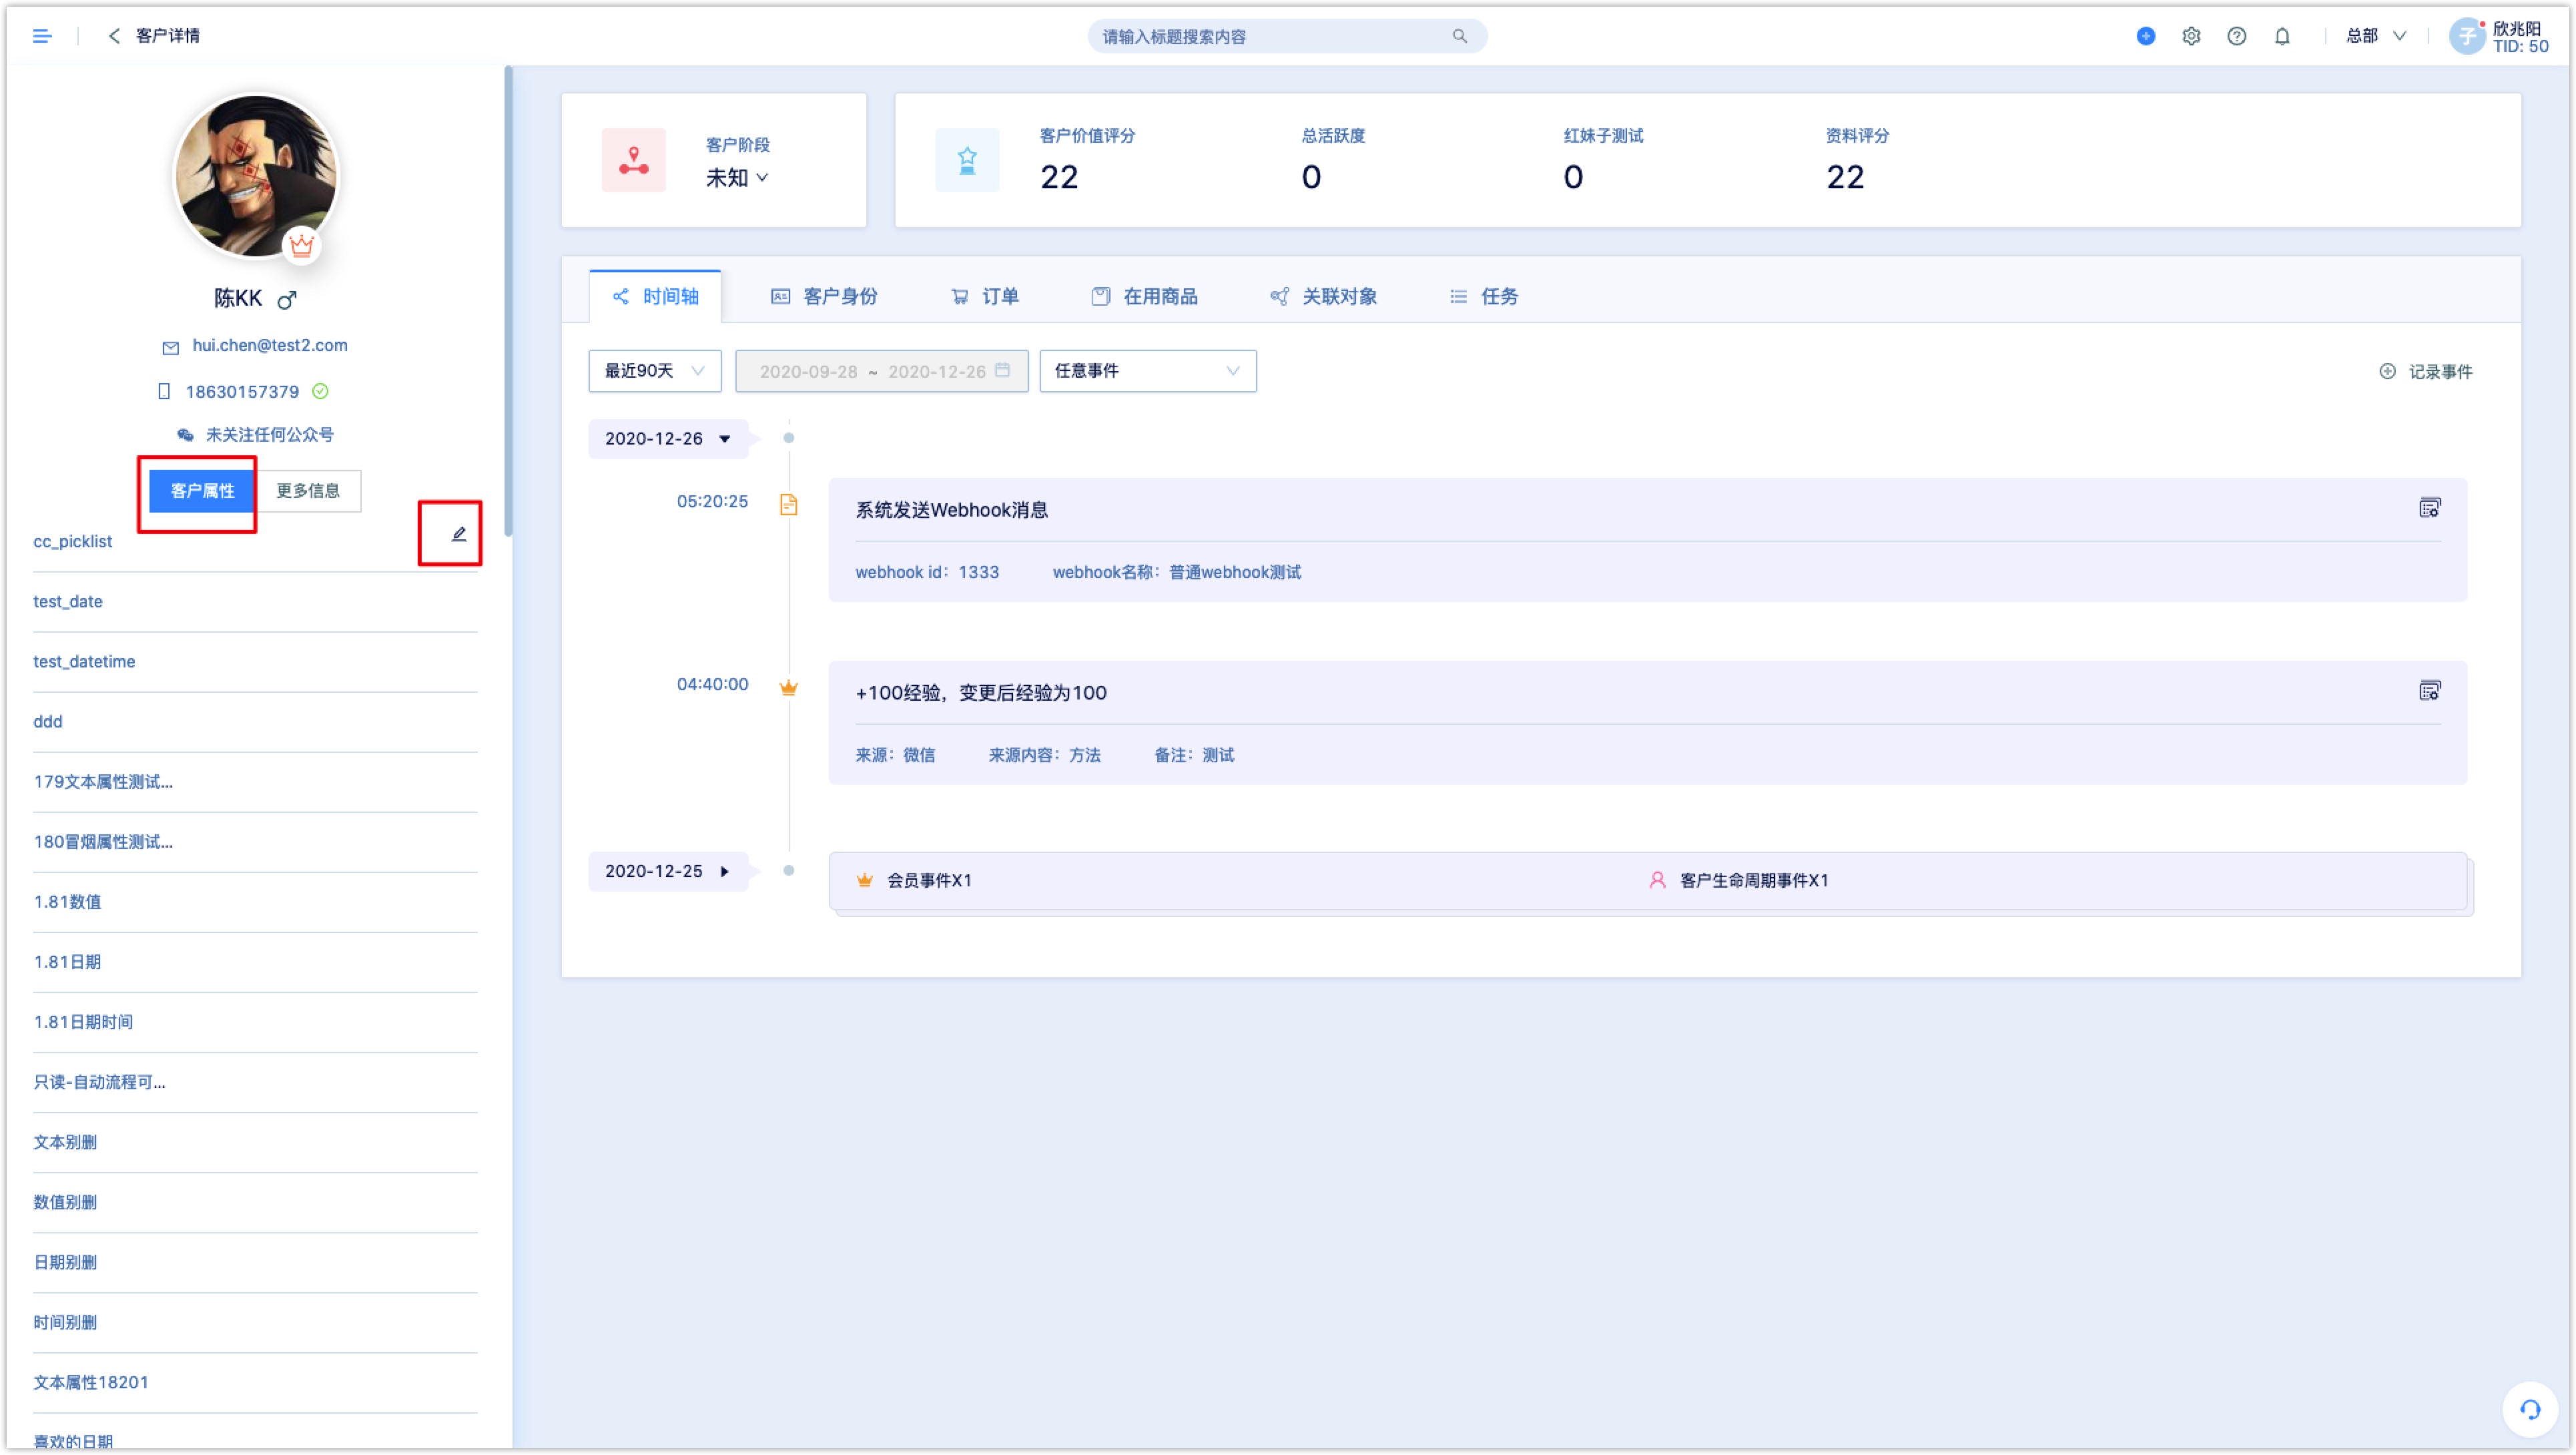
This module shows all the properties of the customer, for some attributes which are allowed to modify , click the [Edit] button directly on the corresponding property to modify it.
- More information
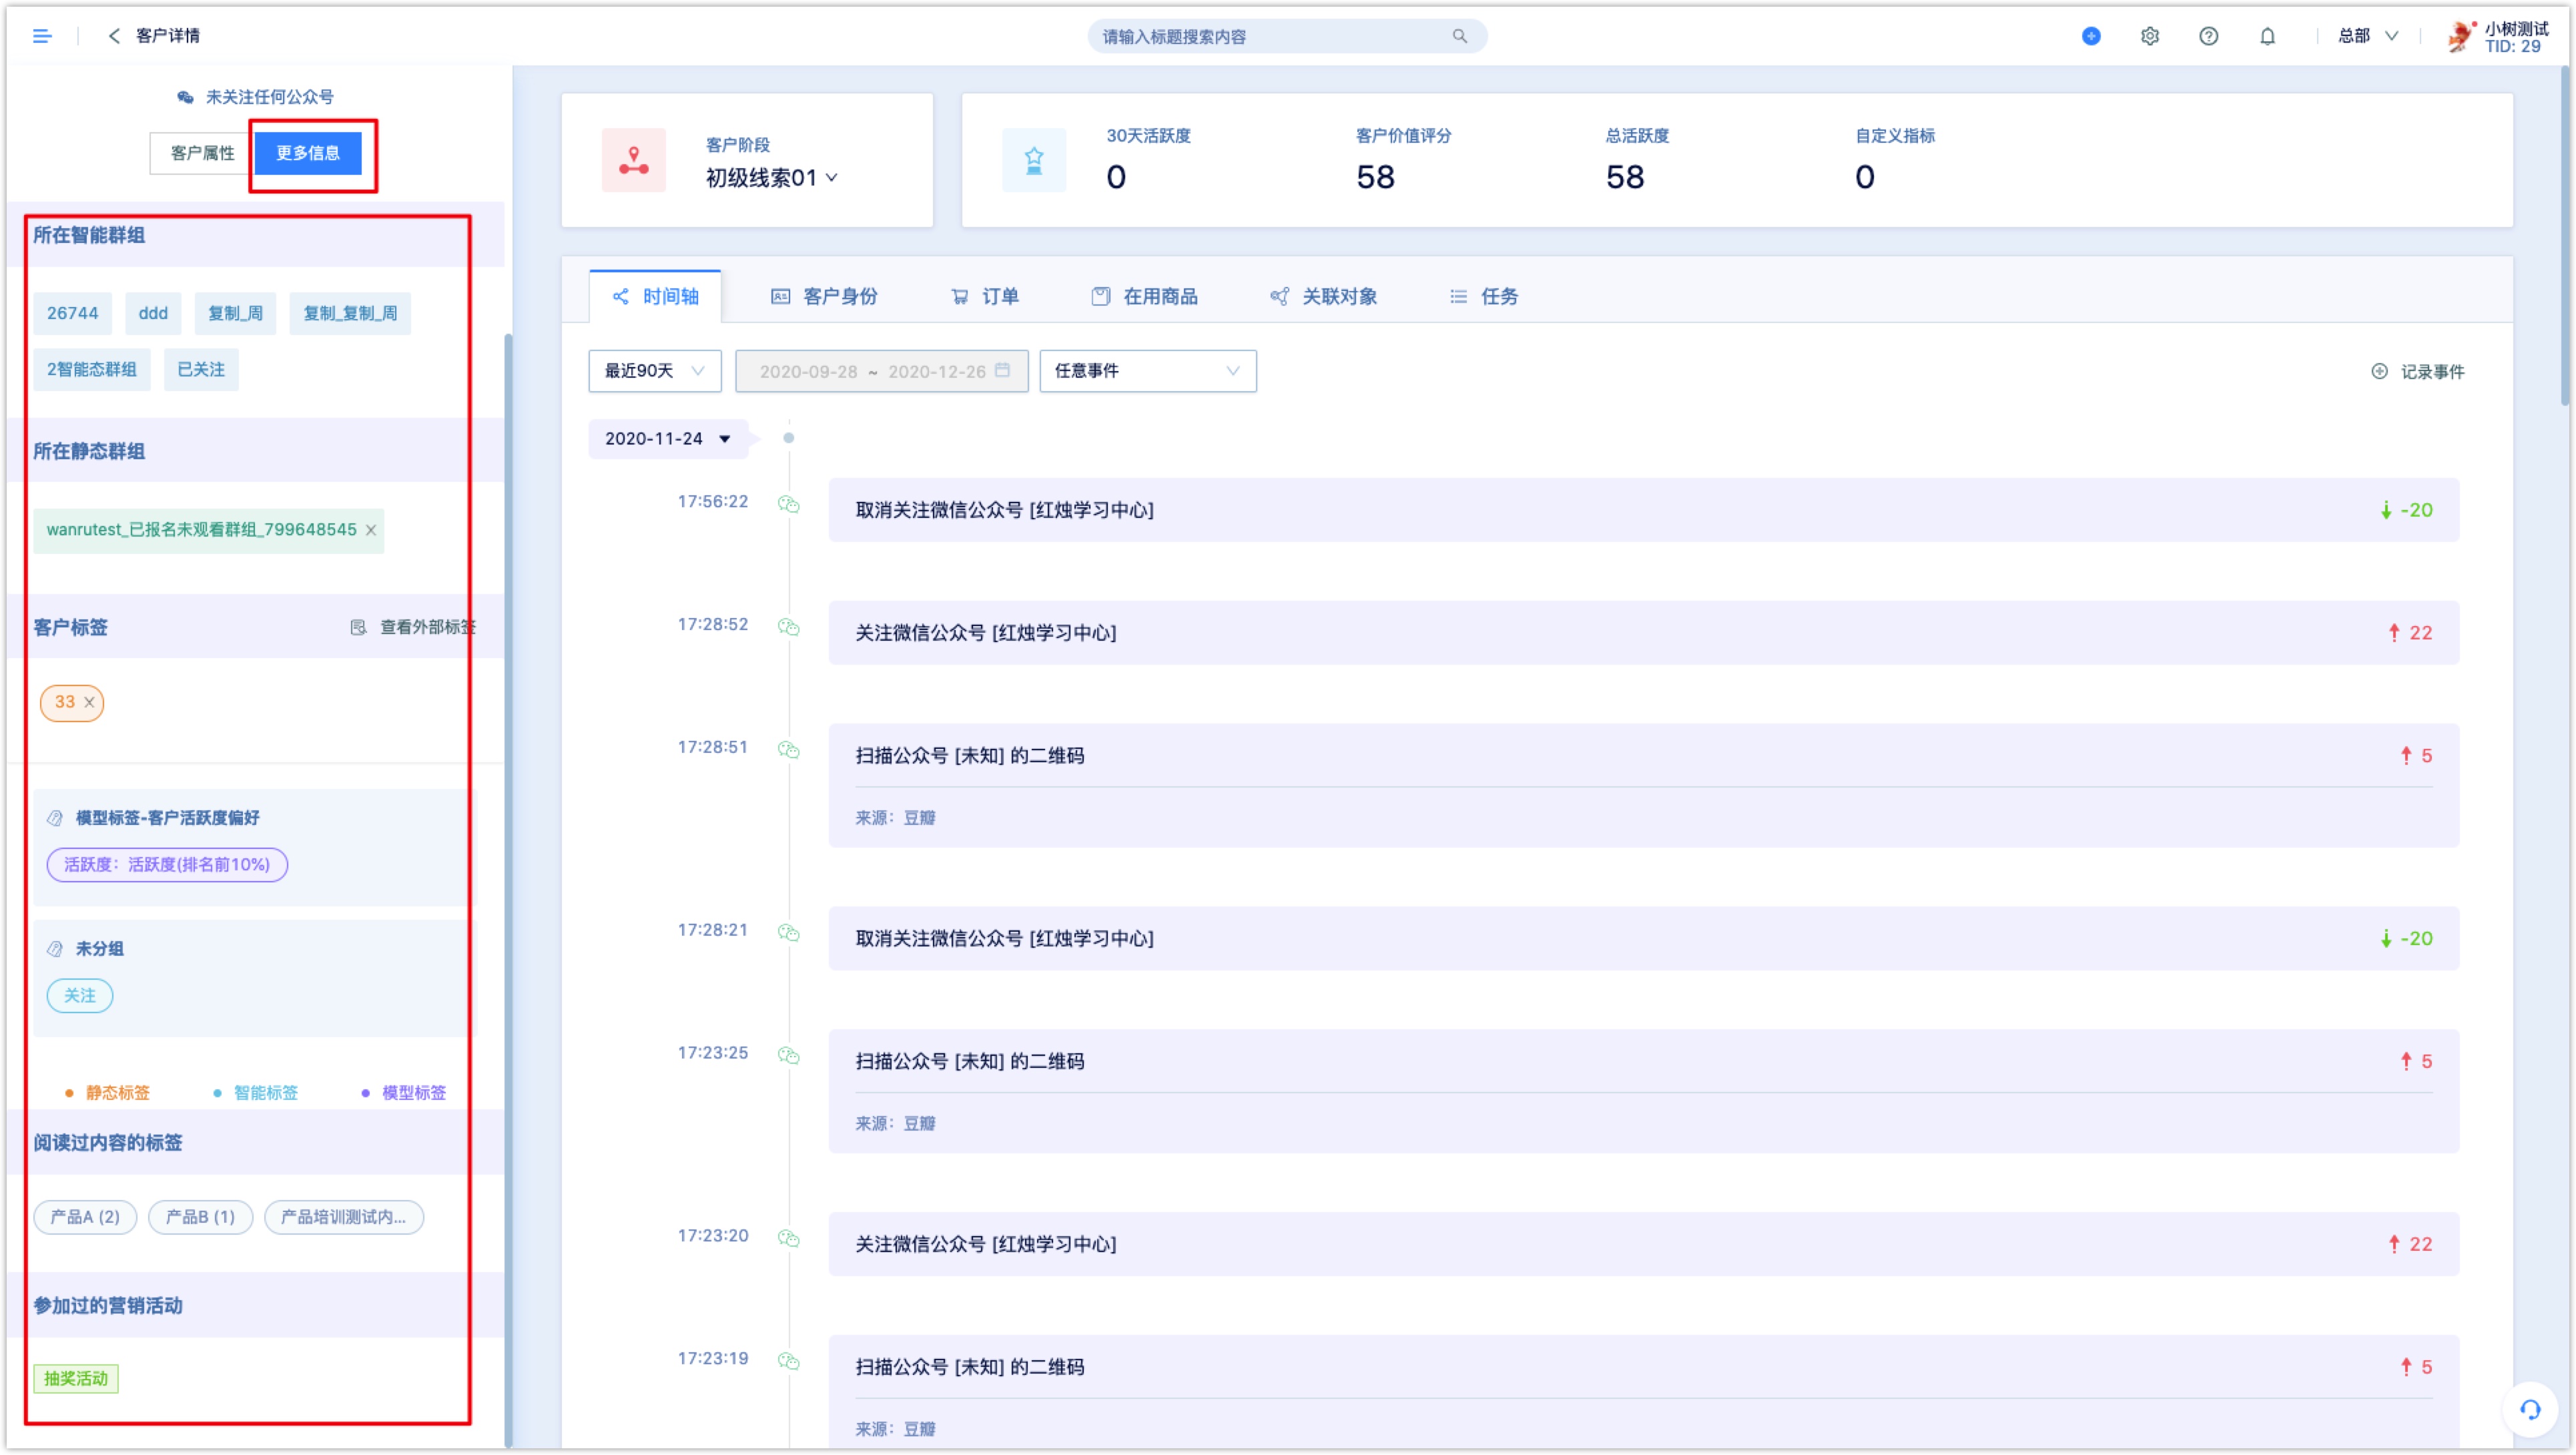
In the [more information] module, smart group which the customer in it, content tag that customer read, marketing campaign cutomer participated In are automatically displayed, can not be modified here. When a customer is in a smart group, it will be displayed here. When a customer reads something with a content tag, it will be displayed here,. the number of Read times will be displayed behind the tag. When a customer participates in a marketing campaign, it will be displayed here. Customer tags can be added and removed manually.
3.2others
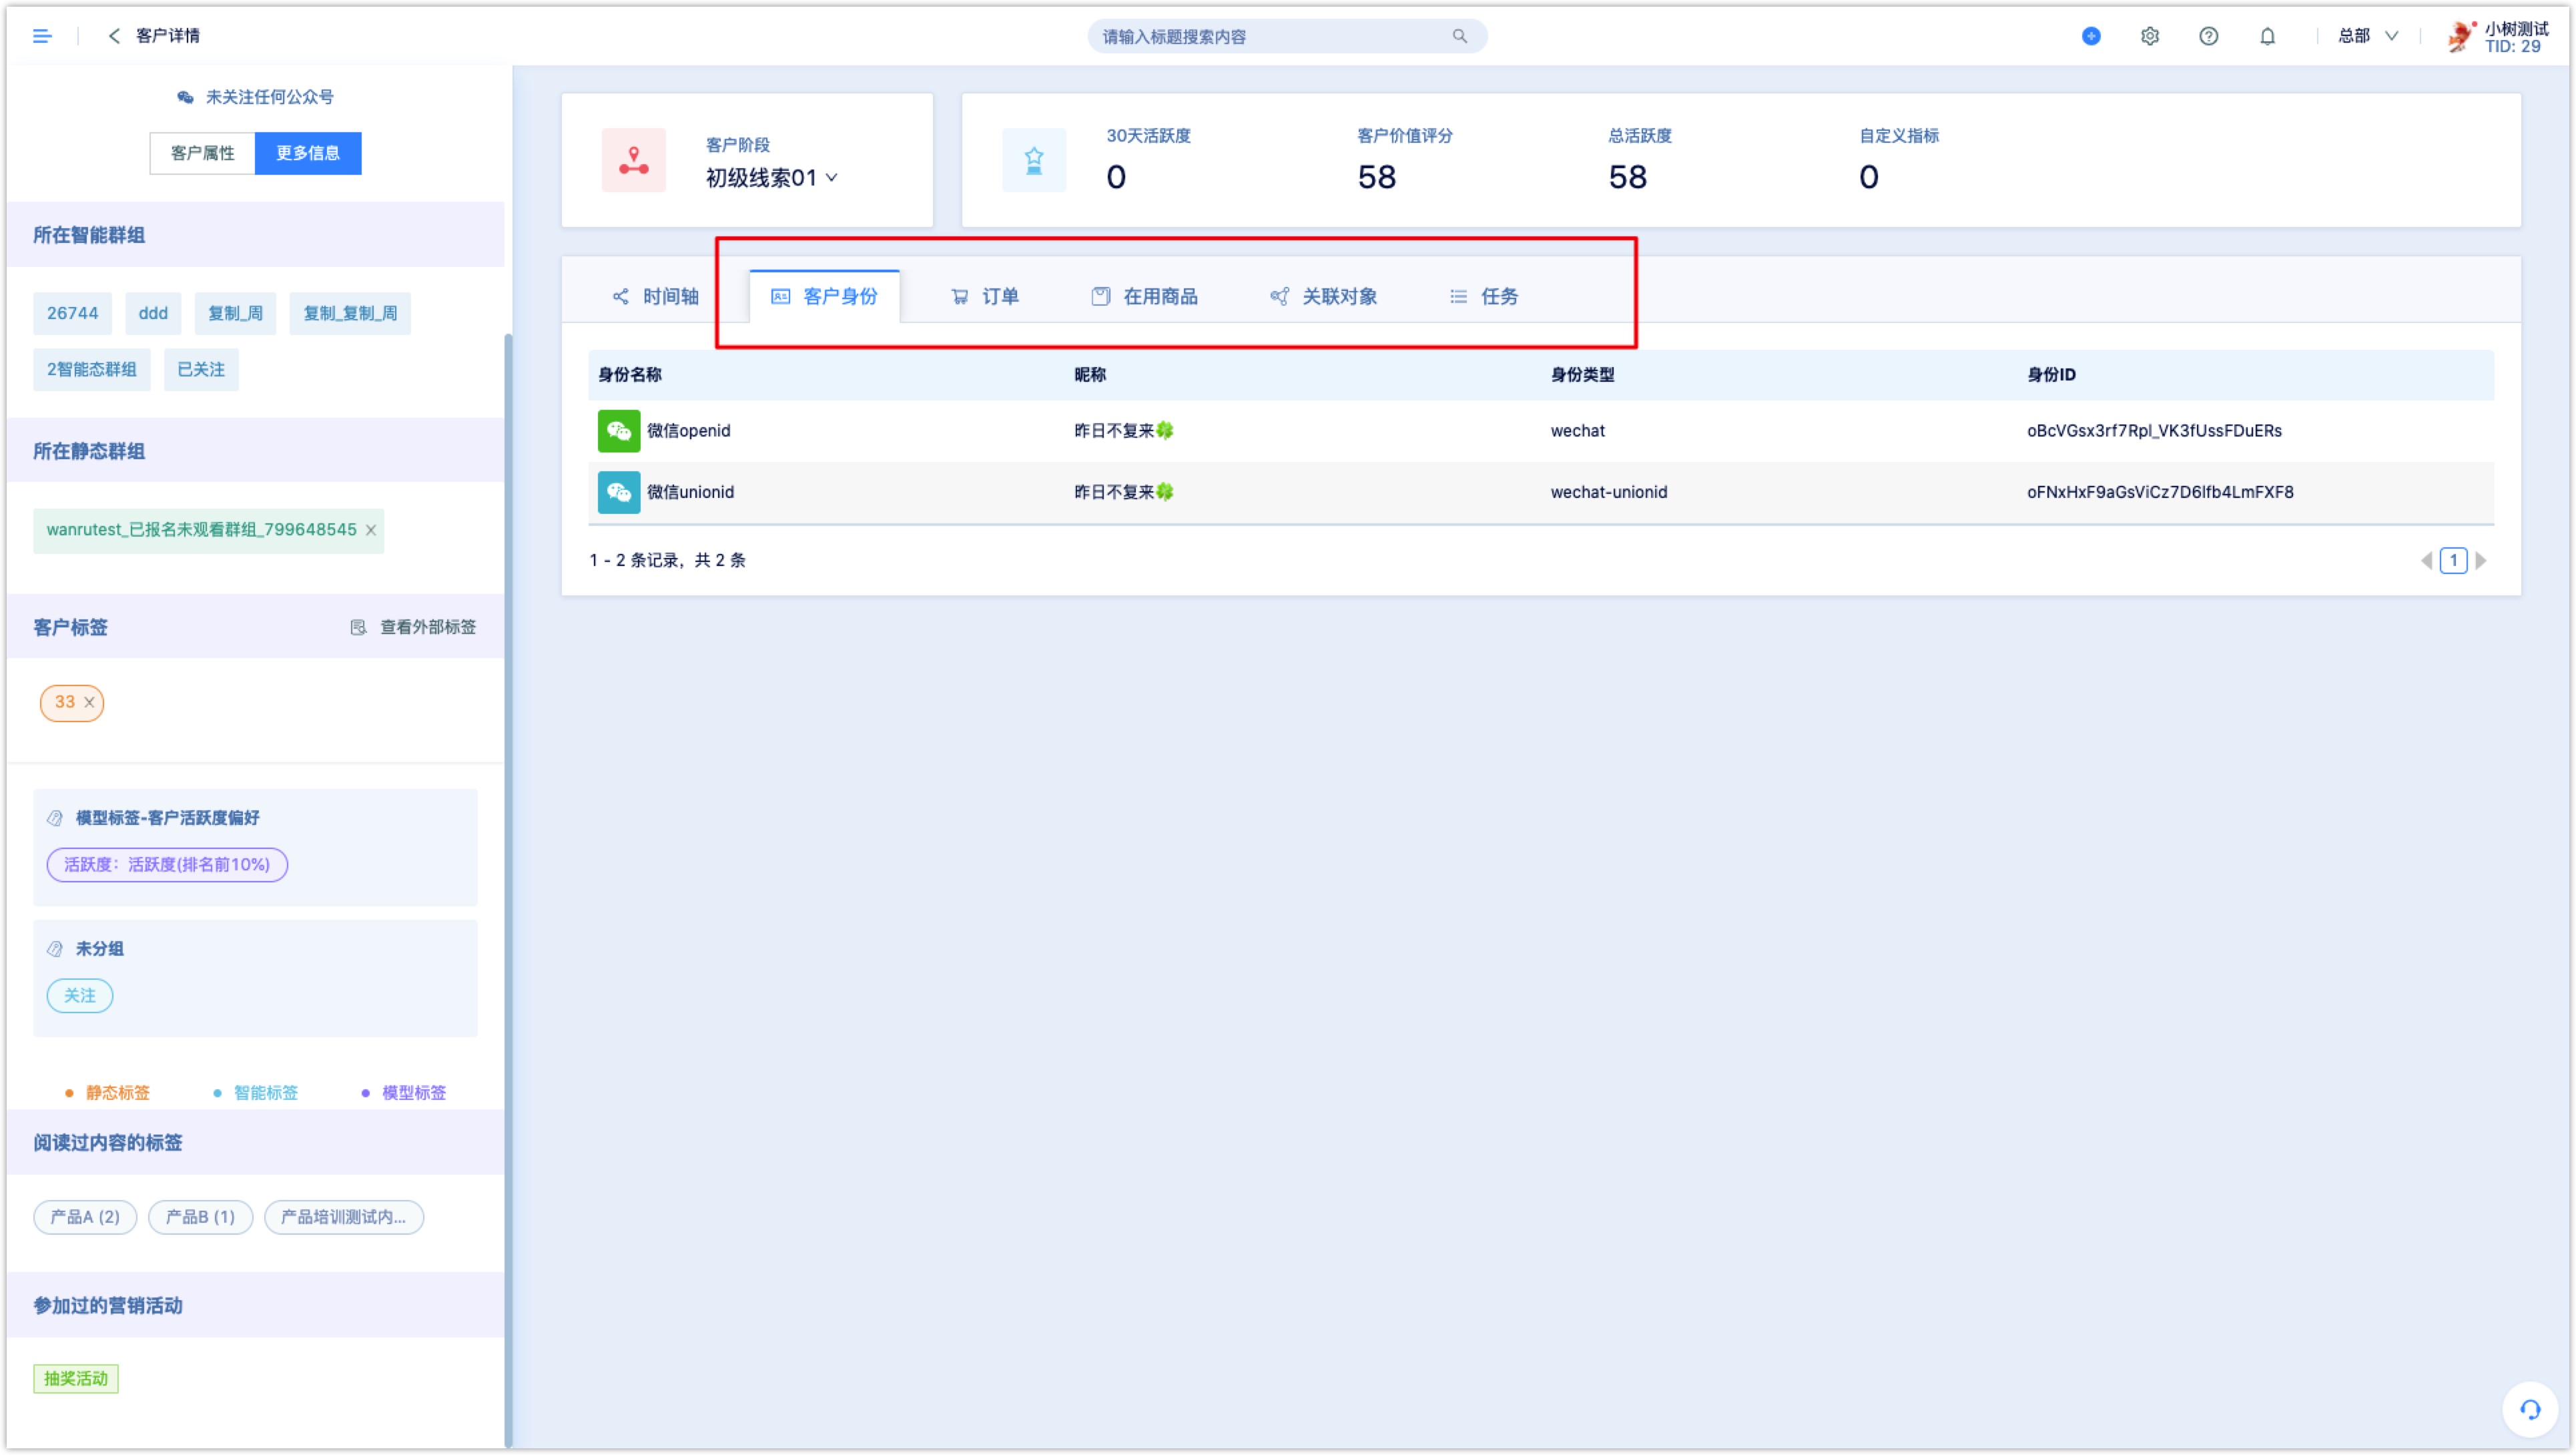
See others:
Customer stage:you can view the customer's stage here, or you can click the drop-down box to change it manually
Customer metrics:you can view metrics such as activity and customer value ratings
Timeline:this module records all customer events, including customer lifecycle events, WeChat events, page form events, email events, Message events, purchase goods events , services events, and customer custom events. The system collapses customer events by default, and you can click expand to view details. You can also manually record events: click [record events], fill in the event information then save it.You can also filter to view customer event types for specific times
Customer identity:you can view all identity types and ID orders: click on the specific order to see the details of this order
Order:you can click specific order to know more details about it
Associated object:you can manually create a new Associated object
Tasks:you can directly create a new task on this page, change the task status. Click on the specific task name to view the details of the task. The system will hide the completed tasks by default, click [Show completed】to view.
